Ever glanced out of your window on a sunny day, only to be greeted by streaks and smudges that mar your view of the world? It’s like your windows are clinging onto every speck of dirt they’ve ever met. Well, it’s time to break up that relationship and let the light shine through those panes, my friend!
Enter the world of homemade window cleaners. I’m not talking about witches’ brews or magic potions—although, to be fair, the way they dissolve grime is pretty enchanting. I’m here to guide you through the alchemy of everyday ingredients that are just lounging around your home, waiting for their chance to sparkle and shine.
So, grab a cup of your favorite beverage, and let’s chat about the secrets behind the glass that’s so clean, you’ll forget it’s even there. Forget about those over-the-counter cleaners with ingredients longer than a Sunday grocery list. We’re about to go all-natural, save some green, and get our windows so clean they’ll be the envy of the neighborhood. Are you ready to transform the mundane task of window cleaning into an art form? Let’s dive in!
Table of Contents
- Unlock Sparkling Windows with Vinegar and Water Magic
- The Dawn of Streak-Free Glass with Dish Soap
- Rubbing Alcohol for a Crystal-Clear Reflection
- Lemon Juice Mix: Nature’s Answer to Shiny Windows
- Ammonia Power Wash – The Grime Fighter
- Cornstarch Secret: The Unlikely Hero in Window Cleaning
- Tea Brewing Trick for Tint-Free Tranquility
- Hydrogen Peroxide: The Gentle Giant for Window Stains
- Club Soda Splash for Effervescent Shine
- Baby Shampoo Solution for the Most Sensitive Surfaces
- Questions & Answers for Homemade Window Cleaners That Work
- To Conclude
Unlock Sparkling Windows with Vinegar and Water Magic
If you’ve ever gazed out your window only to have your view obstructed by smudges and streaks, fear not, for there’s a potion at hand, one that’s been tried and tested through generations: the homemade window cleaner made from nothing but vinegar and water. This natural concoction isn’t just eco-friendly, it’s pocket-friendly too, and the results are nothing short of miraculous. We’ve laid out the alchemy of mixing this potent yet simple solution just for you.
Step 1: The Gathering of Ingredients. Begin your journey to pristine windows by combining equal parts water and distilled white vinegar. The acidity in the vinegar cuts through dirt and grease without leaving any harmful residues behind. If you’re battling against particularly stubborn stains, don’t hesitate to adjust the ratio in favor of vinegar for that extra kick.
Step 2: The Blend. Mix the solution in a spray bottle for easy application. If you’re making a larger batch, ensure you have a secure container for storage. Tip: For an even deeper clean, add a drop of your favorite dish soap to the mixture – just enough to help with those extra grimy challenges without causing too many suds.
- Fine mist spray bottle
- Distilled white vinegar
- Water (distilled for best results)
- Optional: A drop of dish soap
Step 3: The Application. Spray your homemade window cleaner onto the glass surface and wipe away with a clean, lint-free cloth or a squeegee. Follow up with a buff using a crumpled newspaper or microfiber towel for a finish so clear, the glass will be invisible to the naked eye! Remember, the best time to embark on your window cleaning quest is on a cloudy day, as direct sunlight can cause the solution to evaporate too quickly, leaving behind new streaks.
| Ingredient | Quantity | Purpose |
|---|---|---|
| Distilled White Vinegar | 1 Part | Grim-Cutting Acidity |
| Water | 1 Part | For Dilution |
| Dish Soap (Optional) | 1 Drop | Extra Grease-Fighting Power |
Not only does this simple DIY solution save you from the chemical overwhelm often found in commercial cleaners, but it also grants you the joy of self-sufficiency as you master the art of glass cleaning. The sparkling results, combined with the faint, clean scent of vinegar that quickly dissipates, exemplify why homemade window cleaners are a game changer. And while your windows are left gleaming, the knowledge that this cleaner is pet and child-friendly will put your mind at ease. A win for your windows and your wellbeing!
The Dawn of Streak-Free Glass with Dish Soap

When it comes to creating homemade window cleaners, simplicity can be surprisingly effective. Who knew that a common kitchen staple like dish soap could be your secret weapon against smudges and streaks? Let’s dive into a practical, step-by-step guide to ensure your windows are so clear, they’ll have birds doing double-takes!
Ingredients and Tools
Before you begin your glass-cleaning odyssey, you’ll need to gather a few household items:
- 2 cups of water (distilled for best results)
- 1/4 teaspoon of dish soap (preferably a gentle, non-toxic brand like Dawn)
- 1/4 cup of white vinegar (optional, for extra cleaning power)
- Spray bottle
- Lint-free microfiber cloths or newspapers
Mixing Your Solution
Gather your ingredients, and let the alchemy begin:
- Fill the spray bottle with 2 cups of distilled water. Tap water is also fine, although using distilled water reduces the potential for mineral deposits on your glass.
- Add the 1/4 teaspoon of dish soap to the water.
- Optional: For more challenging jobs, pour in the 1/4 cup of white vinegar.
- Cap the bottle and gently swirl to mix without creating too many suds.
Cleaning Process
With your homemade window cleaner prepped, follow these steps for a streak-free shine:
- Spray a generous amount of your homemade solution onto the window glass. No need to drench it, but make sure the surface is sufficiently dampened.
- Using a microfiber cloth or newspaper, wipe in a circular motion, starting from the top to avoid dripping on areas you’ve already cleaned.
- For stubborn spots, let the solution sit for a minute, then gently scrub away.
- Follow up with a vertical then horizontal wipe to cover all angles and minimize streaks.
The Results
The beauty of this homemade window cleaner lies in its simplicity. The dish soap acts as a gentle solvent that cuts through grime without harsh chemicals. Vinegar, if you choose to use it, can improve cleaning power, but may leave a slight odor that dissipates quickly. The end result? A streak-free, crystal-clear window that offers an unobstructed view of your world.
| Pros | Cons |
|---|---|
| Non-toxic and pet-friendly | Aroma of vinegar (if used) |
| Economical and eco-friendly | Requires a bit of elbow grease for tough grime |
| Leaves no streaks when done properly | Solution must be mixed before use |
Who knew that a concoction as simple as dish soap and water can transform the mundane chore of window cleaning into an exercise in chemical-free alchemy. Now your are armed with a homemade solution that promises sparkling results.
Rubbing Alcohol for a Crystal-Clear Reflection

When it comes to homemade window cleaners, the key to that streak-free shine often lies in the addition of one secret weapon: rubbing alcohol. Its secret power is in its evaporation rate, which helps prevent those pesky streaks from forming as you wipe. In this part of our homemade window cleaners series, we’ll dive into the wonders of rubbing alcohol and how to integrate it into your cleaning routine for windows so clear, they’ll have birds second-guessing!
Let’s start with the essentials. To make your homemade window cleaner with rubbing alcohol, you’ll need the following ingredients:
- 1/2 cup rubbing alcohol (70% concentration)
- 1/2 cup water (distilled for best results)
- 1 tablespoon white vinegar
Gather these items and mix them in a spray bottle, giving a gentle shake to integrate them fully. The vinegar works with the alcohol to clean and disinfect, while the diluted concentration ensures it’s safe for your windows without causing harm to vinyl frames or window tints.
Apply the solution by spraying generously onto the glass surface, but avoid over-saturation, which can lead to drips and additional streaks. Use a clean, lint-free microfiber cloth for best results.
Why a microfiber cloth, you ask? Their finely-woven fibers effectively trap dirt and moisture without leaving behind fluff, unlike paper towels or standard cloth rags. As you wipe, move in a Z-pattern starting from the top, this method ensures comprehensive coverage and reduces the chances of missing spots.
If the sunlight is pouring in, try to clean on a more overcast day, or in the evening, as direct sun can cause the solution to dry too quickly, creating streaks.
While rubbing alcohol is a powerhouse for window cleaning, let’s polish this section off with a clear view of its pros and cons:
The Pros:
- Quick evaporation rate for streakless shine
- Disinfecting properties for a deeper clean
- Easily accessible and cost-effective
The Cons:
- Can be irritating to skin and respiratory system
- Flammable and should be used with caution
Opting for rubbing alcohol in your homemade window cleaner mix provides an effective solution thanks to its quick-drying and disinfectant qualities. Keep in mind to use it in a well-ventilated area and store it safely away from heat. This simple but mighty chemical is the clear choice for those seeking a professional-grade clean on a DIY budget.
Lemon Juice Mix: Nature’s Answer to Shiny Windows
There’s a secret ingredient in your kitchen that doubles as an eco-friendly sheen for your panes. Lemon juice, a natural grease cutter, is a star player in the world of homemade window cleaners. It’s not just your water with a twist at a fancy brunch; let’s squeeze more from this citrus wonder!
Start by mixing together the perfect potion of simple, yet effective ingredients. In a large bowl, combine 2 tablespoons of lemon juice, 1/2 teaspoon of gentle dishwashing soap (lemon-scented for continuity, if you fancy), and 2 cups of water. If you’re battling against tougher grime, add a pinch of table salt for a mild abrasive quality. Stir this effervescent blend until it’s homogenous, then pour it into a reusable spray bottle for easy application.
- 2 tbsp lemon juice
- 1/2 tsp dishwashing soap
- 2 cups water
- Pinch of salt (optional for tough grime)
Now, let’s put this golden mixture to the test. Spray a generous amount of your homemade lemony mix onto the window surface. Grab a microfiber cloth or a crumpled newspaper for a sustainable choice, and work in a circular motion followed by vertical then horizontal swipes for a streak-free shine. The acid in lemon juice effortlessly breaks down dirt, leaving behind nothing but sparkling glass and a refreshing scent that is sure to lift your spirits.
Why choose the Lemon Juice Mix? First off, it’s nature-friendly and economical—no harsh chemicals or heavy price tags. Plus, lemons have antibacterial properties providing an added benefit of a clean beyond the visible. However, do bear in mind, if sunshine hits your windows like a spotlight on a Broadway star, it is best to clean during the cooler parts of the day. Heat can cause the lemon juice mix to dry too fast, potentially leaving behind streaks. Embrace this bright, tangy solution on a cloudy day or in the evening to ensure the best results.
| Pros | Cons |
|---|---|
| Eco-friendly | May streak in direct sunlight |
| Cost-effective | Requires reapplication for heavy grime |
| Antibacterial natural properties | Not suitable for calcium deposit removal |
| Pleasant scent | Limited shelf life |
Refresh, Reuse, and Relish your clean windows with a twist of lemon – naturally!
Ammonia Power Wash – The Grime Fighter
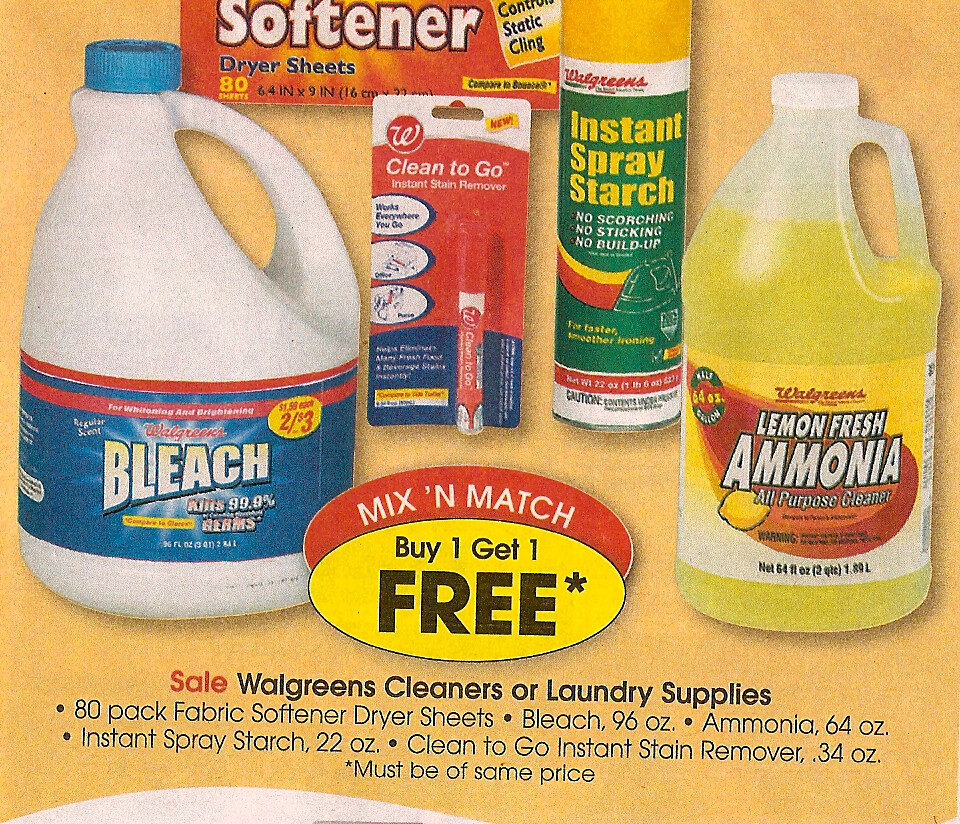
Ammonia is a potent ally when battling against the tenacious grime that clings to your windows. Its ability to cut through dirt makes it a cornerstone ingredient for homemade window cleaners. But before you charge headfirst into the fray against filth, it’s crucial to understand the might of this grime fighter. Used with precision and care, a diluted ammonia solution can restore the sparkle to your windows with startling efficiency.
To wield ammonia safely, mix one part ammonia with three parts water in a spray bottle. The dilution not only tempers its strength but also ensures that you won’t damage your windows or irritate your skin. Remember to don gloves and work in a well-ventilated area, as the fumes can be quite potent.
Once your solution is mixed, spray generously onto the window surface. Let it sit for a moment to allow the ammonia to declare war on the grime. Then, with a clean microfiber cloth or squeegee, work in a circular motion, starting from the top and descending to vanquish the dissolved dirt. The result? A transparent window that not only lets in sunshine but also your triumphant gaze as you observe your handiwork.
To achieve the best outcome with your homemade window cleaner, consider the following tips:
- Never mix ammonia with bleach or other household cleaners – the combination can produce toxic gases.
- Rinse thoroughly with clean water, ensuring no ammonia residue remains to streak or damage the window.
- Buff dry with a separate, dry cloth for a shimmering finish, free from leftover grime or cleaning marks.
Following this guide will transform your windows from grimy to gleaming, all with the power of a simple, effective homemade window cleaner.
Cornstarch Secret: The Unlikely Hero in Window Cleaning

When you think about homemade window cleaners, cornstarch might not be the first ingredient that jumps to mind. Yet, this humble kitchen staple holds the key to streak-free windows without the harsh chemicals found in commercial cleaners. Intrigued? Let’s dive into how this powdery wonder can transform your window cleaning routine.
Why Cornstarch?
Cornstarch works mysteriously well due to its fine, abrasive texture, which helps in buffing away dirt and grime. It acts as a gentle scrub without scratching the glass, and when mixed with water, it forms a non-sticky paste that enhances cleaning power. Surprisingly, it also leaves a protective layer that resists fingerprints and dust. If you’re skeptical about its prowess, here’s a simple recipe to test the claim:
- 1/4 cup of cornstarch
- 1/4 cup of white vinegar
- 2 cups of warm water
- A bucket or bowl for mixing
Mix these ingredients in your chosen container. For a hygienic and eco-friendly touch, use a reusable spray bottle to apply the concoction directly onto the glass.
Step-by-Step Guide to Sparkling Windows
Using your homemade blend is a breeze. Here’s how to employ cornstarch to achieve glimmering results:
- Spray your windows generously with the cornstarch mixture.
- With a soft scrub brush or microfiber cloth, gently work in circular motions to loosen dirt.
- After scrubbing, rinse thoroughly with clean water.
- Dry with a squeegee or lint-free towel for a streak-free finish.
Not only does this method leave you with crystal-clear views, but it also flaunts a formula that’s kind to both your health and the environment.
The Verdict: Pros and Cons
Using cornstarch as part of your homemade window cleaners might seem unconventional, but it’s worth considering for several reasons. Let’s decipher the pros and cons:
| Pros | Cons |
|---|---|
| Environmentally safe | Requires more effort than chemical sprays |
| Cost-effective and easily available | Can leave residues if not properly rinsed |
| Leaves a protective coat on windows | More time consuming |
The recommendation to go with a cornstarch-based cleaner stems from its non-toxicity and cost-effectiveness. While it may demand a bit more elbow grease, the result is gratifyingly pristine glass and peace of mind—making it an all-around win. So, next time you’re due for a window wash, whip out the cornstarch and witness its magic for yourself!
Remember, every pristine window started with someone who dared to try a scoop of cornstarch. It’s not just about the gleam; it’s about embracing a safe, responsible approach to home care that benefits everyone.
Tea Brewing Trick for Tint-Free Tranquility
Believe it or not, a simple cup of tea can be your secret ingredient for sparkling, streak-free windows. The tannic acid in black tea works wonders in dissolving grime and leaving behind a pristine sheen. This section brews up the perfect homemade window cleaner recipe using just tea, transforming your usual chore into a tranquil, tint-free experience.
Firstly, you’ll want to gather your supplies. For this trick, you only need:
- A large pot to boil water
- About 3-4 black tea bags (the stronger, the better)
- A clean, empty spray bottle
Now, let’s put the kettle on! Boil a quart of water and steep your tea bags for a strong brew – you’ll need that punch of tannic acid. Allow your brew to cool to room temperature. The cooler tea ensures you don’t inadvertently harm your window surfaces or risk any steam streaks when applying the mixture. Once cooled, remove the tea bags and transfer your homemade window cleaner solution to the spray bottle.
To use your tea-based cleaner, follow these simple steps:
| Step | Instructions |
|---|---|
| 1 | Spritz the tea-infused cleaner generously on the glass surface. |
| 2 | Use a clean microfiber cloth to wipe in circular motions, starting at the top and working your way down. |
| 3 | Switch to a dry side of the cloth and buff the window to a glistening shine. |
| 4 | Stand back, sip the remaining tea, and admire your lint-free, streakless view. |
The beauty of this homemade window cleaner isn’t just in its simplicity, but also in its eco-friendliness and cost-effectiveness. You’re using natural ingredients, avoiding harsh chemicals, and repurposing them from your pantry. The downside? It might not tackle extremely grimy or greasy windows as effectively as commercial cleaners.
However, for regular maintenance and a tranquil cleaning ritual, this tea brewing trick is a clear winner. Not to mention, you create an opportunity for a serene moment for yourself amidst the household hustle – a win in our book.
Hydrogen Peroxide: The Gentle Giant for Window Stains
When it comes to homemade window cleaners, hydrogen peroxide is a secret weapon that’s both gentle and effective. Especially for those troublesome stains that seem immune to soapy water, this household staple can provide a much-needed boost without the harshness of ammonia-based products. Below, you’ll find a step-by-step guide on utilizing hydrogen peroxide to whip up a safe, eco-friendly window cleaning solution that’ll leave your windows sparkling and streak-free.
Step 1: The Magical Mixture: To begin, mix one cup of hydrogen peroxide with one quart of distilled water. The importance of using distilled water cannot be overstated—it prevents potential mineral build-up on your windows. Stir this well in a spray bottle, ensuring a thorough blend. Hydrogen peroxide is sensitive to light, so using a dark, opaque bottle is an effective way to preserve the mixture’s cleaning potency.
- Ingredients:
- 1 cup of 3% hydrogen peroxide
- 1 quart of distilled water
Step 2: Application: Spray the solution generously on window surfaces, targeting the stains directly. Allow the homemade window cleaner to sit and work its magic for a couple of minutes. The mild bleaching properties of hydrogen peroxide act slowly, but effectively, to break down the stains without damaging window surfaces.
Step 3: Wipe Off the Grime: After a short dwell time, use a microfiber cloth or squeegee to wipe the window clean. With circular motions for stubborn stains and straight strokes for the final touches, you’ll notice the stains lifting away, leaving clear glass in their wake. Unlike standard cleaners, there’s no strong scent or risk of discoloration, making hydrogen peroxide an excellent choice for delicate and tinted windows.
| Pros | Cons |
|---|---|
| Eco-friendly and non-toxic | Slow acting compared to commercial cleaners |
| Gentle and safe for most surfaces | Requires dark container for storage |
Why Hydrogen Peroxide? I recommend hydrogen peroxide for its versatility and safe chemical profile. While it can’t boast the immediate results of industrial strength solutions, its gentle efficiency earns it a top spot among homemade window cleaners. It’s a perfect choice for families, pet owners, or anyone looking to reduce their chemical footprint without sacrificing cleanliness. Try it out, and witness how this unsung hero transforms your window cleaning routine.
Club Soda Splash for Effervescent Shine

Unlock the Sparkling Potential of Homemade Window Cleaners
Have you ever noticed the lively fizz that dances atop a freshly poured glass of club soda? This effervescence can add more than a zip to your sip—it can bring a brilliant shine to your windows, too. The secret behind this carbonated concoction is simple: Club soda, with its dissolved minerals and carbonation, cuts through grime and leaves a streak-free finish, making it an excellent base for homemade window cleaners.
Step-by-Step Guide to a Dazzling View
Creating your own club soda window cleaning solution is a breeze. Start by thoroughly rinsing an empty spray bottle to eliminate any residue from previous contents. Next, follow this recipe for a crystal-clear outlook:
- Fill the spray bottle halfway with club soda.
- Add a teaspoon of white vinegar for its disinfectant properties and grease-cutting power.
- Optional: Add a few drops of your favorite essential oil for a pleasant aroma. Lemon or lavender work beautifully.
- Top off the spray bottle with more club soda, leaving space to attach the sprayer without causing overflow.
Apply with Care for Best Results
To wield this homemade window cleaner effectively, spray generously onto the glass surface and wipe with a clean, lint-free microfiber cloth. Use a circular to zigzag motion for the initial clean, then polish with straight vertical then horizontal strokes for a finish so clear, you’ll question if the glass is even there!
Why Club Soda Cleansers Trump the Rest
The allure of club soda-based cleaners is not just in their simplicity, but also in their eco-friendliness and lack of harsh chemicals. These mixtures are safe for homes with pets and children, and by using a reusable spray bottle, you’re contributing to a waste-free cleaning regime. The absence of soapy residues ensures your windows remain clear longer, meaning fewer chores and more time to enjoy your spotless view.
| Cleaner Type | Pros | Cons |
|---|---|---|
| Club Soda Cleaner | – Eco-friendly | – Requires fresh club soda for best fizz |
| Commercial Cleaners | – Powerful clean | – Contains chemicals |
| – Can be costly | ||
| – Not eco-friendly | ||
| Vinegar Solution | – Natural degreaser | – Pungent odor |
| – Antibacterial |
Baby Shampoo Solution for the Most Sensitive Surfaces

When it comes to cleaning delicate windows or surfaces like stained glass or tinted windows, you need a solution that’s gentle enough to prevent damage but effective at cutting through grime. This is where your homemade window cleaner concoction with a surprising ingredient – baby shampoo – becomes a game-changer.
First, why baby shampoo? It’s designed to be soft on skin, which translates to being gentle on surfaces that need a tender touch. Combine a few drops of this mild cleaner with distilled water, and you’ve got a winning solution. To begin, mix together in a large bowl:
- 2 cups of distilled water, to minimize hard water stains
- 1/4 teaspoon of baby shampoo, for its gentle cleaning power
- A drop of lemon essential oil for a streak-free shine and a pleasant scent (optional)
Stir gently to prevent excessive foaming, then pour into a spray bottle. The trick with using this homemade window cleaner is to apply it sparingly; a little goes a long way. Spray lightly across the surface and wipe away with a clean, soft microfiber cloth. You’ll find that this solution not only cleans effectively but also leaves no residue, ensuring your windows stay pristine without any harsh chemical smells.
| Ingredient | Amount | Purpose |
|---|---|---|
| Distilled Water | 2 Cups | Base/Minimize Stains |
| Baby Shampoo | 1/4 Teaspoon | Cleaning Agent |
| Lemon Essential Oil | 1 Drop | Scent/Shine |
This gentle yet powerful homemade window cleaner shines in its simplicity. The use of baby shampoo is particularly savvy for homes with pets or children – it’s safe if accidentally ingested in small amounts. As for drawbacks, it’s not the strongest on tough grime, but for regular maintenance and sensitive areas, it can’t be beaten. It’s also cost-effective and environmentally friendly, relying on natural, readily biodegradable ingredients – a clear choice for the conscientious homeowner.
So, when faced with those delicate, easily scratched surfaces, reach for the baby shampoo bottles. Your windows will thank you with a streak-free sparkle that’s as gentle on the earth as it is on your home.
Questions & Answers for Homemade Window Cleaners That Work
What’s the Secret Behind a Streak-Free Window Shine?
Ah, the elusive quest for streak-free windows. The secret? It’s all about the ingredients and technique. A mixture of plain distilled vinegar and water is a time-honored homemade solution. The vinegar cuts through grease and grime without leaving behind any soapy residue that causes streaks. For the best results, use a squeegee or a clean microfiber cloth to wipe down the windows. It’s about working smart, not hard – let the solution do the heavy lifting!
Can I Make a Window Cleaning Solution for Sensitive Noses?
Definitely! If the vinegar’s scent is a bit too pungent for your sniffer, there’s a softer solution. Mix a concoction of lemon juice with water. Lemon has natural grease-cutting properties and leaves a refreshing, faint scent that won’t offend your delicate nostrils. Plus, it’s great for those impromptu window cleans when you want to quickly brighten up the room before guests arrive.
Is There a Window Cleaning Solution for Hard Water Stains?
Absolutely, and this can be a real game changer for those plagued with hard water. Try adding a couple of drops of dish soap to your vinegar and water mixture. The soap acts as a surfactant, breaking down the mineral deposits left behind by hard water. After applying your solution, don’t forget to give your windows a final rinse with distilled water to avoid new spots from forming.
What About an Eco-Friendly Cleaner for My Tinted Windows?
Tinted windows need a gentle touch, and a simple solution of distilled water and a few drops of baby shampoo can work wonders. This blend ensures that there are no harsh chemicals that can damage the window tint while keeping those windows sparkling. And as a bonus, you keep Mother Nature smiling with this eco-friendly option!
What’s the Best Way to Dry Windows After Cleaning?
To avoid those pesky streaks, using a squeegee is top-notch. It swiftly swipes away the cleaning solution and water, leaving you with dry, streak-free windows. If a squeegee isn’t your style, a clean, lint-free microfiber cloth or even newspaper gives you that clean, dry finish. The goal here is to be quick and efficient; the less water left on the glass, the less likely you’ll have streaks plotting a comeback.
Can I Make a High-Tech Solution for the Gunkiest of Windows?
For the ultimate battle against grimey windows, let’s amp up that cleaning power! Add a tablespoon of cornstarch to your vinegar and water mixture. The cornstarch acts as a mild abrasive, perfect for tackling the gunk, all without scratching your windows. It’s like sending in a troop of tiny scrubbers to polish your glass to perfection.
How Often Should I Whip Up This Homemade Miracle Mix?
Whenever you start to see your windows looking a little lackluster! Depending on your location, climate, and household activities, a monthly session usually does the trick. If you live in an area with more pollution or traffic, you might roll up your sleeves every couple of weeks. Just remember, regular maintenance is the key to ensuring that your homemade solution will always work its magic.
Any Tips for Cleaning Windows on a Sunny Day?
While it might seem like a bright idea to clean windows on a sunny day, it’s actually a bit of a no-no. The sun can quickly dry your cleaning solution before you’ve had a chance to properly wipe it off, leading to those dreaded streaks. Cloudy days are perfect for this task, as the indirect light slows down the drying time, and you get a streak-free shine without the pressure!
What’s a Winter-Friendly Cleaning Solution for Chilly Windows?
Winter window cleaning can be a frosty business, but there’s a solution that can handle the chill. Add a splash of rubbing alcohol to your standard vinegar-water mixture. The alcohol helps to lower the freezing point, meaning you can clean away without the mixture turning into an ice rink on your panes.
Can Homemade Window Cleaners Handle Outdoor Dirt and Pollen?
They surely can! For outdoor window warriors fighting against stubborn dirt and pollen, just give the window a good pre-rinse with a hose to remove the chunky offenders. Then, tackle the windows with your trusty homemade solution and watch as the grime waves a white flag. Don’t forget to give the windows a final rinse or squeegee for the best results and bask in the glory of your crystal-clear handiwork.
To Conclude
As we draw the curtains on our sparkling journey of homemade window cleaning concoctions, it’s clear that streak-free views don’t require a trip to the store or a hit to your wallet. Whether it’s the trusty combo of vinegar and water, the zesty charm of lemon juice, or the dynamic fizz of baking soda with its bubbly sidekick vinegar, you’re now equipped with the recipes to ensure your windows are so clean that birds will have to second-guess their flight path.
Remember, crafting the perfect DIY window cleaners is like mixing a signature cocktail – it requires a dash of patience, a sprinkle of elbow grease, and a generous pour of love for your home. With your newly minted arsenal of natural solutions, you’re not just wiping away smudges; you’re opening a clearer panorama to the world outside, and maybe, just maybe, a cleaner outlook on life from the inside.
So, the next time you’re gazing out of your impeccably clear window, take a moment to bask in the gleaming reflection of your own ingenuity. And should the sun cast a sparkle on your glass that catches your eye, don’t just see it as a job well done; consider it a wink from Mother Nature, applauding your choice to go the eco-friendly way.
Now go forth, armed with your squeegee and eco-warrior badge, and let the light in. After all, isn’t it about time we all enjoyed a clearer view.