Hey there! If you’re anything like me, you’ve probably struggled with getting those pesky wrinkles out of your clothes. But fear not, because I’ve got the ultimate ironing guide that will have your clothes looking sharp in no time!
Let’s face it, ironing can be a real chore. But with the right tools and techniques, you can make the task a breeze. In this guide, I’ll walk you through everything you need to know to achieve perfectly pressed clothes every time.
From choosing the right temperature setting for different fabrics to mastering the art of proper ironing techniques, I’ve got you covered. No more wrinkled shirts or creased pants – with this guide, you’ll be a pro in no time!
So, grab your iron, turn on your favorite playlist, and get ready to transform your wardrobe with The Ultimate Ironing Guide for Crisp Clothes. Trust me, you’ll never look at ironing the same way again!
Selecting the Right Iron Temperature for Different Fabrics
Let’s talk about the art of ironing, folks. We all know it’s not the most glamorous chore, but there’s something immensely satisfying about transforming crumpled, wrinkled fabrics into smooth, sleek masterpieces. And to nail this art, one key factor is selecting the right iron temperature for different fabrics. It’s like finding the perfect balance in life, you know? Not too hot, not too cold.
So, let’s break it down. Here’s a nifty little guide to help you navigate the world of ironing like a pro:
- First off, let’s tackle the delicate darlings – silk and satin. These babies need some tender loving care, so keep the iron temperature low, around 300°F or 148°C should do the trick.
- Now, for our cotton companions – a trusty workhorse in any wardrobe. Crank up the heat a bit to around 400°F or 204°C to banish those stubborn wrinkles.
- Next, we’ve got our linen legends. They can handle the heat, so a temperature of 445°F or 229°C will give you those crisp, clean lines.
But hey, that’s not all! We’ve still got polyester, wool, and nylon waiting in the wings. Each one has its own quirks and preferences, just like your favorite characters in a good book. You wouldn’t treat Hermione Granger the same way you’d treat Ron Weasley, right?
Here’s a nifty little table to summarize it all:
| Fabric Type | Ideal Iron Temperature (°F) | Ideal Iron Temperature (°C) |
|---|---|---|
| Silk/Satin | 300°F | 148°C |
| Cotton | 400°F | 204°C |
| Linen | 445°F | 229°C |
| Polyester | 300°F – 350°F | 148°C – 177°C |
| Wool | 300°F | 148°C |
| Nylon | 275°F | 135°C |
Now, the key to mastering the ironing game is to test a small, inconspicuous area of the fabric first, like detective work before committing to the whole thing. This way, you can be sure you’ve got the right temperature without any nasty surprises. And remember, always follow the garment’s care label instructions – they’re like the holy grail of ironing dos and don’ts.
So there you have it, folks! Selecting the right iron temperature for different fabrics is like finding the perfect dance partner – once you’ve got the rhythm down, there’s no stopping you! Happy ironing!
Steam Ironing for Wrinkle-Free Linen and Cotton

Are you tired of battling with stubborn wrinkles and creases on your beloved linen and cotton garments? Fear not, as we have the perfect solution for you – steam ironing! This simple yet effective method will leave your clothes looking crisp and crease-free, saving you time and effort in the long run.
So, how exactly do you go about steam ironing your linen and cotton items to perfection? Let’s dive right in and explore the step-by-step process that will revolutionize your ironing routine.
- Step 1: First things first, fill up your steam iron with distilled water to ensure a steady flow of steam. This will help to relax the fibers in your garments, making them easier to iron.
- Step 2: Set your iron to the appropriate steam setting for your fabric. Linen and cotton typically require a medium to high steam setting to effectively remove wrinkles without damaging the fabric.
- Step 3: Lay your garment on the ironing board and gently smooth out any major wrinkles by hand. This will make the ironing process much more efficient.
| Linen | Cotton |
|---|---|
| Iron on the reverse side to prevent shine | Iron while slightly damp for best results |
| Use a pressing cloth to avoid scorching | Iron in sections to ensure thorough wrinkle removal |
| Hang garments after ironing to maintain shape | Use a steam burst feature for stubborn creases |
By following these simple guidelines, you can achieve wrinkle-free perfection with your linen and cotton items, leaving them looking crisp and fresh every time. With a little patience and the right technique, you’ll be a steam ironing pro in no time!
Ironing Shirts with a Press Cloth for a Polished Finish
Are you tired of wrinkled shirts that make you look sloppy and unprofessional? Do you want to achieve that polished and crisp look without spending a fortune on dry cleaning? Well, fret not, because we’ve got the perfect solution for you – ironing shirts with a press cloth!
So, what’s a press cloth, you ask? Think of it as a protective barrier between your iron and your shirts. It helps prevent any direct contact between the iron and the fabric, keeping delicate garments safe from scorch marks and shine. Plus, it makes ironing a breeze and gives your shirts that flawless finish.
Step-By-Step Guide to Ironing Shirts with a Press Cloth for a Polished Finish
Here’s how you can achieve that professional look with just a few simple steps:
- Set up your ironing board and plug in your iron. Make sure to check the fabric care label on your shirt for the recommended ironing temperature.
- Place the press cloth over the wrinkled area of the shirt. Smooth it out to make sure it’s flat and covers the entire wrinkled area.
- Adjust the temperature of your iron according to the fabric type. For delicate fabrics, use a lower heat setting to avoid any damage.
- Gently press the iron onto the press cloth, moving it in a circular motion to smooth out the wrinkles. Be sure not to leave the iron in one spot for too long to avoid heat damage.
- Remove the press cloth and check your shirt for any remaining wrinkles. If needed, repeat the process until your shirt looks perfectly pressed.
No more excuses for walking around in crumpled shirts that make you look like you just rolled out of bed! With this simple ironing technique, you can achieve that polished and professional look without breaking a sweat.
Now, go ahead and give it a try – your shirts will thank you for it!
Vertical Steaming Technique for Delicate Garments and Drapes
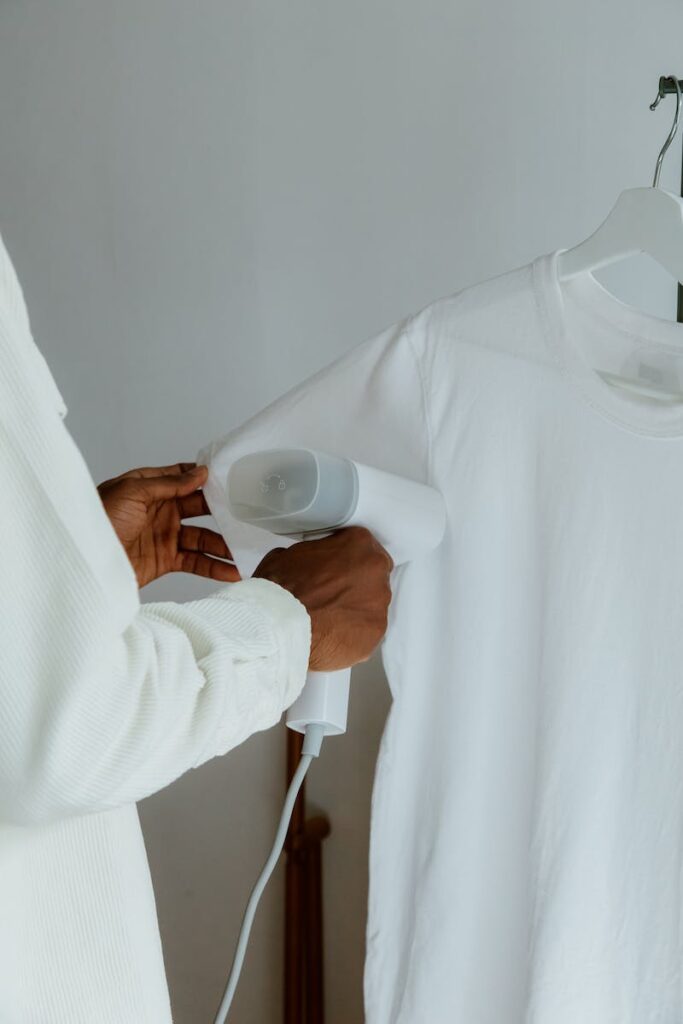
The Vertical Steaming Technique
Steamy Magic for Your Delicate Garments and Drapes
Hey there, busy bees! We know you’ve got a ton on your plate, balancing work, family, and everything in between. But let’s talk about a little something that will make your life a whole lot easier – the Vertical Steaming Technique. This nifty trick is a game-changer when it comes to keeping your delicate garments and drapes looking fresh and fabulous. Say goodbye to wrinkled woes and hello to a flawless look with minimal effort!
Vertical Steaming 101
Alright, let’s break it down step by step. First, grab your trusty steamer and fill it up with water. While it’s heating up, hang your garment or drape on a hanger and set it at a convenient height. Once the steamer is ready to rock, hold it a few inches away from the fabric and gently move it up and down, releasing a cloud of wrinkle-busting steam as you go. It’s like giving your clothes a luxurious spa treatment!
Delicate Delights
Now, we know what you’re thinking – “But what about my delicate fabrics?” Fear not, dear readers. The Vertical Steaming Technique is gentle enough for even the most finicky fabrics. From silk to satin, chiffon to lace, and everything in between, your delicate garments and drapes will thank you for the tender loving care.
Ironing Guide
Okay, we can hear the skeptics saying, “But what about ironing?”. Well, fear not, friends! This steaming technique can seamlessly integrate with your ironing routine. For those stubborn creases that just won’t budge, whip out your iron and give them a quick once-over. The combination of steaming and ironing ensures a flawless finish that’s smoother than a fresh jar of peanut butter.
The Eco-Conscious Choice
Let’s not forget the eco-conscious readers out there. Vertical Steaming is not only convenient and efficient but also a sustainable choice. Say farewell to wasteful disposable wrinkle-releasing sheets and hello to the power of steam. It’s like giving Mother Nature a high-five while looking fabulous in your freshly steamed ensemble.
Final Thoughts
Ladies and gents, the Vertical Steaming Technique is a game-changer in the world of garment care. It’s a time-saving, eco-friendly, and effective way to keep your delicate garments and drapes looking sharp without breaking a sweat. So next time you’re faced with a mountain of wrinkled laundry, grab that trusty steamer and work some magic on your wardrobe. Your clothes will thank you, and you’ll look like a million bucks with minimal effort. Happy steaming!
Using Distilled Water to Prevent Mineral Build-Up in Steam Irons
So, you’ve finally decided to tackle that mountain of wrinkled clothes staring back at you from the laundry room. You power up your steam iron, ready to conquer those creases, but wait! Is there an annoying mineral build-up hindering the iron’s performance?
If your answer is a reluctant nod, fear not! We’ve got just the solution to keep that steam iron in tip-top shape. Enter distilled water, the unsung hero in the battle against mineral build-up.
Let’s dive into the nitty-gritty of using distilled water to prevent mineral build-up in steam irons. It’s time to bid farewell to those pesky stains on your favorite garments and say hello to a smoother, more efficient ironing experience.
Now, let’s take a closer look at the step-by-step process to ensure your steam iron stays in pristine condition:
- Step 1: Grab a bottle of distilled water from your local grocery store or online retailer. Remember, distilled water is the real MVP here, as it contains fewer minerals compared to tap water.
- Step 2: Check the water tank of your steam iron and pour the distilled water into it. Make sure not to overfill the tank to avoid any spills.
- Step 3: Power on your steam iron and let the magic (oops, we meant science!) of distilled water work its wonders. As the steam is released, you’ll notice a significant decrease in mineral build-up over time.
- Step 4: After each use, empty any remaining distilled water from the tank and give it a quick rinse. This helps prevent any residual mineral deposits from causing trouble in the future.
In addition to preventing mineral build-up, using distilled water in your steam iron can also prolong the appliance’s lifespan and maintain its efficiency. It’s a win-win situation for both your clothes and your trusty iron.
As you embark on this ironing adventure, keep in mind that proper care for your steam iron extends beyond the water you use. Regular cleaning and maintenance, combined with the use of distilled water, will keep your iron running smoothly and your clothes looking their best.
So, there you have it! With distilled water by your side, you can bid farewell to mineral build-up and embrace wrinkle-free, crisp garments with open arms.
| Benefits of Using Distilled Water in Steam Irons: |
|---|
| Prevents mineral build-up |
| Prolongs iron’s lifespan |
| Maintains iron’s efficiency |
| Preserves garment quality |
The Importance of Ironing in Stages for Tailored Items
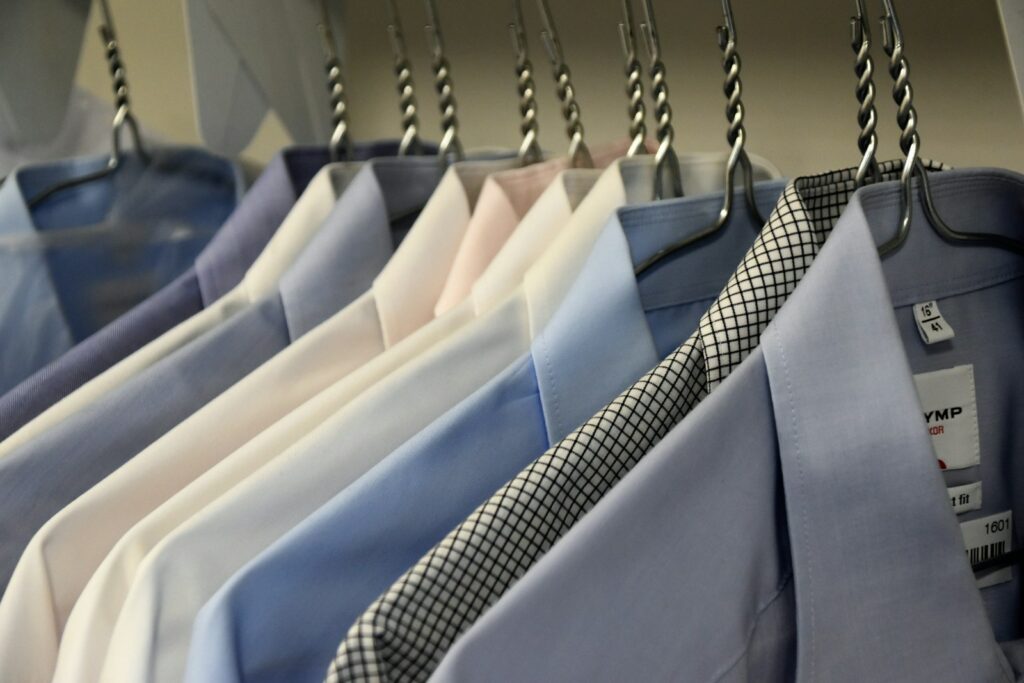
Ironing is more important than you might think. It’s the finishing touch that makes tailored items look polished and professional. Here’s why ironing in stages is essential for maintaining the quality of your clothes.
Let’s start by breaking down the ironing process into stages. This not only makes the task more manageable, but it also ensures that each item is thoroughly ironed to perfection.
1. Sorting
Before diving into the ironing process, take a moment to sort your clothes by fabric type and care instructions. This will help you prioritize which items need immediate attention and which can wait. Additionally, sorting will prevent any potential damage to delicate fabrics.
2. Prepping
Once you’ve sorted your clothes, it’s time to prep them for ironing. Check the care labels to determine the appropriate heat setting for each item. If you’re unsure, start with a lower heat setting and gradually increase it as needed. Prepping your clothes in this way will prevent accidental scorching or burning.
3. Ironing
Now that your clothes are sorted and prepped, it’s time to start ironing. Begin with items that require the lowest heat setting and work your way up. This way, you won’t risk damaging any delicate fabrics with excessive heat. Remember to iron both the inside and outside of tailored items to ensure a crisp finish.
4. Finishing
After ironing each item, take a moment to hang or fold them neatly. This will prevent any wrinkles from forming before you have a chance to wear them. It’s the final touch that ensures your hard work won’t go to waste.
Now that you understand the importance of ironing in stages, you can see how it contributes to the overall quality and lifespan of your tailored items. It’s the little details that make all the difference in the long run.
So next time you’re tempted to skip the ironing process, remember that a little extra effort can go a long way in preserving the look and feel of your clothes. And who doesn’t want to look their best, right? Trust us, your wardrobe will thank you for it!
Ironing Inside Out to Preserve Dark and Printed Fabrics
When it comes to caring for dark and printed fabrics, one of the most important things you can do is iron them inside out. This simple step can help preserve the color and design of your favorite clothing, ensuring that they stay looking fresh and vibrant for as long as possible.
Ironing inside out is a great way to protect delicate fabrics and intricate designs from the direct heat of the iron. By turning your clothing inside out before ironing, you can minimize the risk of damaging the fabric or causing the colors to fade.
So, how do you iron inside out to preserve dark and printed fabrics? Here’s a step-by-step guide to help you get the best results:
- Start by setting up your ironing board and plugging in your iron.
- Turn the garment inside out and lay it flat on the ironing board.
- Adjust the temperature of your iron according to the fabric care label. For example, if you’re ironing a delicate silk blouse, you’ll want to use a lower heat setting to avoid damaging the fabric.
- Gently iron the inside of the garment, being careful to avoid pressing too hard or leaving the iron in one spot for too long.
- Pay special attention to any printed or embellished areas, using a pressing cloth if necessary to protect delicate designs.
- Once you’ve finished ironing the inside of the garment, turn it right side out and give it a final once-over to smooth out any remaining wrinkles.
- Hang or fold the garment immediately to prevent new wrinkles from forming.
By following these simple steps, you can keep your dark and printed fabrics looking their best for years to come. Whether you’re getting ready for a busy day at the office, a family gathering, or just a day out and about, taking the time to iron inside out can make a world of difference in the appearance and longevity of your favorite clothing.
So the next time you’re faced with a pile of laundry, don’t forget to give your dark and printed fabrics the care and attention they deserve. Your clothes will thank you for it!
Utilizing Ironing Boards with Good Padding for Smooth Results
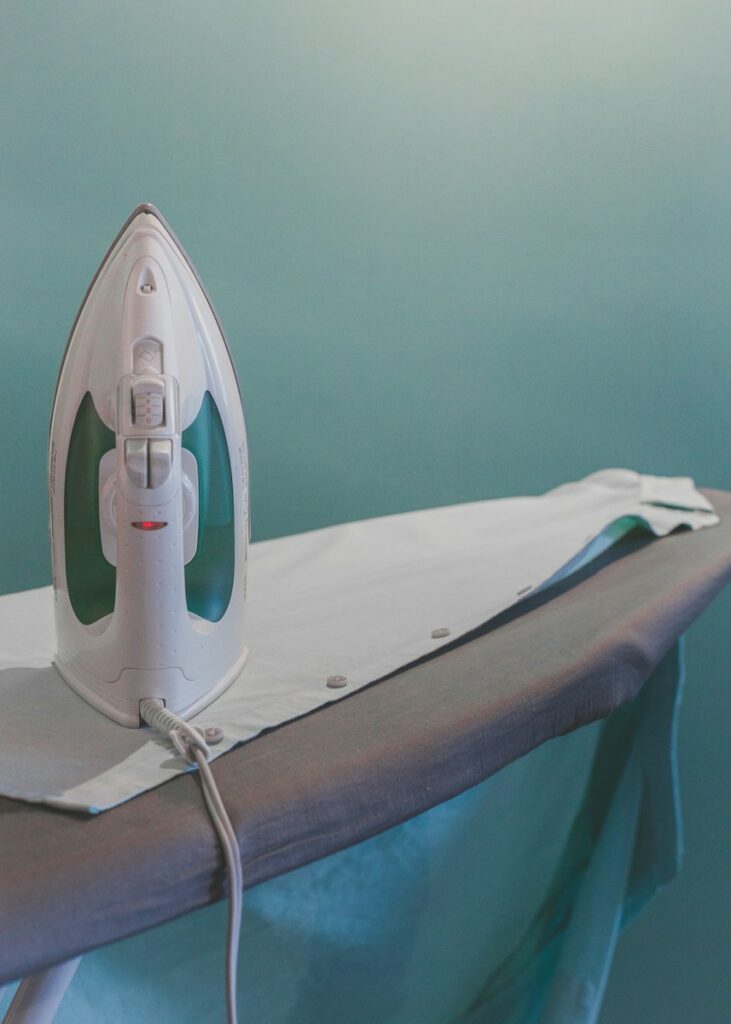
If you want to achieve the smoothest, wrinkle-free results when ironing, one key factor to consider is the padding on your ironing board. A good quality ironing board with proper padding can make all the difference in your ironing experience, making it easier and more effective.
Let’s dive into the details on how to utilize ironing boards with good padding for the best results.
- First and foremost, ensure that your ironing board has a thick and resilient padding. This will provide a smooth and even surface for your clothes, preventing any indentations or imprints from the board itself. A well-padded ironing board will also help to absorb moisture and steam, aiding in the effectiveness of your ironing process.
- When setting up your ironing board, make sure the padding is secure and evenly distributed. An uneven or loose padding can result in an uneven surface, making it difficult to achieve consistent results while ironing. Take a moment to adjust the padding if needed before starting to iron.
- Next, choose the right fabric for your ironing board cover. A heat-reflective, durable cover will further enhance the functionality of your ironing board, helping to evenly distribute heat and steam for optimal results. Look for covers with multiple layers or an additional heat-reflective layer for added efficiency.
- In addition to the padding and cover, consider the height and stability of your ironing board. Make sure it is set at a comfortable working height for you, allowing you to maintain good posture and control while ironing. A stable and sturdy ironing board will also prevent any wobbling or shaking, ensuring a smooth and hassle-free ironing experience.
Now, let’s talk about the actual ironing process. Start by setting up your ironing board near a power outlet and ensure that the cord of your iron can reach comfortably. Place a heat-resistant pad or cloth on the ironing board to protect both the board and the clothes from any potential heat damage.
When ironing different types of fabrics, it’s essential to adjust the heat settings on your iron accordingly. For delicate fabrics, use a lower heat setting to prevent damage, while thicker fabrics may require a higher heat setting for effective wrinkle removal. Always check the care label on your clothes for specific ironing instructions.
As you iron, work systematically and in sections, starting with smaller, less noticeable areas before moving on to larger surfaces. Use smooth and even strokes with the iron, following the natural grain of the fabric to avoid creating new wrinkles. Take your time and be patient, especially with stubborn wrinkles or creases.
Once you’ve finished ironing, allow your clothes to cool and set on the ironing board before handling or folding them. This will help to set the freshly pressed fabric and prevent any new wrinkles from forming. Finally, ensure that your iron is turned off and safely stowed away before storing your ironing board for the next use.
By utilizing ironing boards with good padding and following these practical tips, you can achieve smooth and professional-looking results with ease. Whether you’re ironing professional attire, everyday clothing, or household linens, the right ironing board can make a world of difference. So, give your ironing routine a boost with the perfect ironing board and enjoy the satisfaction of perfectly pressed clothes.
Rolling vs. Ironing: A Strategy for Knitwear and Textured Fabrics
So, you’ve got some knitwear or textured fabrics that need some TLC, but you’re not sure whether to roll or iron them? Well, fear not, because we’ve got the lowdown on the best strategy for taking care of these delicate materials.
When it comes to knitwear and textured fabrics, the age-old debate of rolling versus ironing has been raging for years. But fear not, we’re here to settle the score once and for all.
First things first, let’s talk about rolling. Rolling is like giving your clothes a gentle massage – it’s all about smoothing out those wrinkles and creases without putting them under too much strain. This method is great for delicate knits and textured fabrics that might not fare well under the heat of an iron.
- Start by laying your garment flat on a clean surface.
- Gently roll it up, taking care to smooth out any wrinkles as you go.
- Store your rolled garments in a drawer or on a shelf to maintain their shape and structure.
Now, onto the ironing. Ironing is like giving your clothes a spa treatment – it’s about applying just the right amount of heat and pressure to smooth out those stubborn wrinkles and give your garments a fresh, crisp look.
- Set your iron to the appropriate temperature for the fabric.
- Place a clean cloth over your knitwear or textured fabric to protect it from direct heat.
- Gently press the iron over the fabric, taking care not to linger in one spot for too long.
So, which method is the winner? Well, it all depends on the specific garment and fabric in question. Knitwear and textured fabrics come in all shapes and sizes, so it’s important to consider the individual needs of each piece before deciding whether to roll or iron.
Ultimately, the key is to treat your garments with the care and attention they deserve. Whether you choose to roll or iron, the most important thing is to handle your knitwear and textured fabrics with love and respect.
So, there you have it – the ultimate guide to rolling vs. ironing for knitwear and textured fabrics. Remember, there’s no one-size-fits-all approach, so feel free to experiment and find the method that works best for you and your beloved garments.
Tailor’s Ham for Perfectly Pressed Curves and Darts
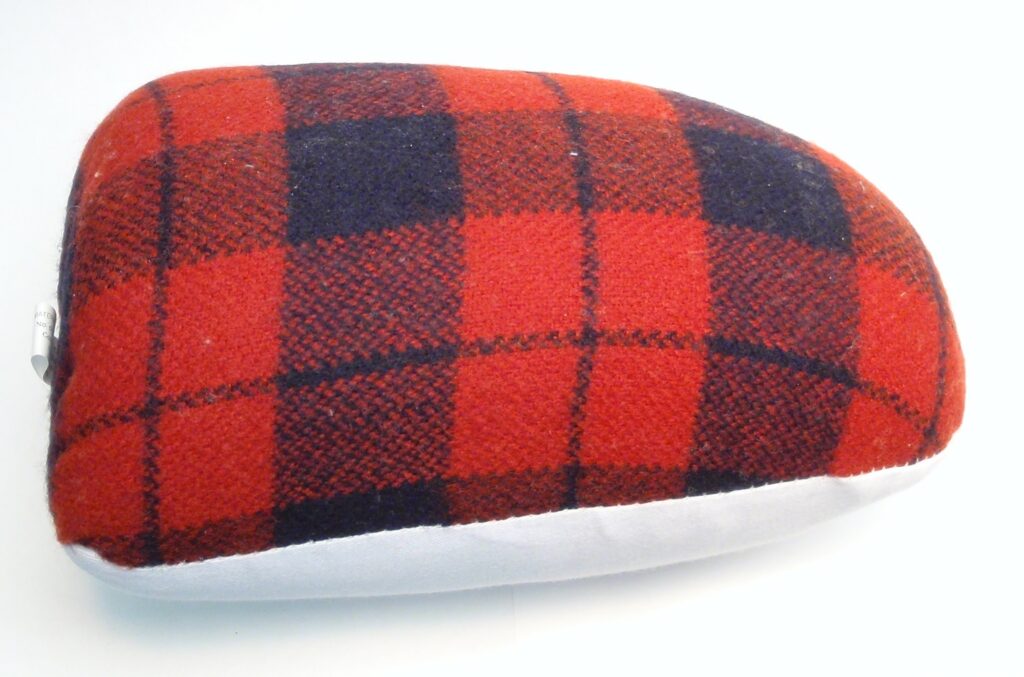
So, you’ve got your trusty iron all fired up and ready to go, but you’re struggling to get those pesky curves and darts perfectly pressed? Fear not, because we’ve got just the tool for you – the Tailor’s Ham!
The Tailor’s Ham is the secret weapon of professional seamstresses and fashionistas everywhere. It’s a little cushion-like tool that is shaped like a ham (surprise, surprise) and is designed to help you press those tricky curved seams and darts without creating unsightly creases or wrinkles. It’s like having a personalized ironing assistant right there with you!
Using a Tailor’s Ham is simple as pie. Just place your garment over the Tailor’s Ham, smooth out the fabric, and then press with your iron. The rounded shape of the ham allows you to iron those curves and darts without flattening them out, maintaining the shape and structure of your garment. It’s like giving your clothes a little spa treatment!
- Place your garment over the Tailor’s Ham
- Smooth out the fabric
- Press with your iron
Not only does the Tailor’s Ham make pressing curves and darts a breeze, but it also helps to achieve a professional-looking finish to your garments. No more wonky seams or mismatched darts – with the Tailor’s Ham, your clothes will look like they just came off the runway!
And the best part? The Tailor’s Ham is an eco-friendly alternative to using excessive amounts of paper or cloth when pressing curved or rounded seams. You can save both time and resources while achieving top-notch results. It’s like giving Mother Nature a high-five!
So, the next time you’re struggling to get those curves and darts perfectly pressed, reach for your trusty Tailor’s Ham and watch the magic happen. Your clothes will thank you, and you’ll never look at ironing the same way again!
Questions and Answers For The Ultimate Ironing Guide for Crisp Clothes
How do I set up my ironing board?
First, make sure your ironing board is set up on a flat surface. Then, adjust the height to a comfortable level for you.
What temperature should I set my iron to?
It depends on the type of fabric you’re ironing. Check the care label on your clothes to determine the appropriate temperature setting for your iron.
Should I use steam when ironing?
Using steam can help remove wrinkles more effectively. Fill the water tank of your iron and use the steam function as needed, but be careful with delicate fabrics.
How do I iron a dress shirt?
Start with the collar, then move to the cuffs, sleeves, and finish with the body of the shirt. Iron in a circular or back-and-forth motion to smooth out wrinkles.
Can I iron delicate fabrics like silk or lace?
Yes, you can, but it’s important to use a lower temperature and a pressing cloth to protect the fabric. Be gentle and avoid leaving the iron in one spot for too long to prevent damage.
What’s the best way to iron a pair of pants?
Begin by ironing the waistband and pockets, then move to the legs from the inside out. Pay attention to creases and press them carefully to create a sharp, clean look.
How do I prevent shiny marks on dark fabrics while ironing?
Place a clean white cloth over the fabric before ironing to protect it from direct heat. This will help avoid any unwanted shiny marks.
Is it necessary to use an ironing board cover?
Yes, using a padded ironing board cover can provide a smoother surface and help absorb excess moisture while ironing, which is especially useful when using steam.
How often should I clean my iron?
It’s a good idea to clean your iron regularly, especially if you use it often. Follow the manufacturer’s instructions for cleaning to keep your iron in good condition.
What’s the best way to store my iron?
Let your iron cool down after use, then wrap the cord around the base and store it in a safe place, away from children and pets, to prevent accidents.
Let’s Wrap Up..
So there you have it, friend! The Ultimate Ironing Guide for Crisp Clothes has got you covered for all your ironing needs. With these tips, you’ll be able to iron like a pro and keep your clothes looking sharp and fresh.
Remember to always start with the right temperature for your fabric, use a good quality iron, and, if you want, try ironing clothes naturally to avoid damage.
You can always continue to checkout Sundown – Cleaning Informational Tips for all your laundry needs info. They have amazing laundry tips to make this chore a breeze. Feel free to investigate the following link for more amazing [laundry tips].
Now go ahead and tackle that ironing pile with confidence! Happy ironing, friend!
