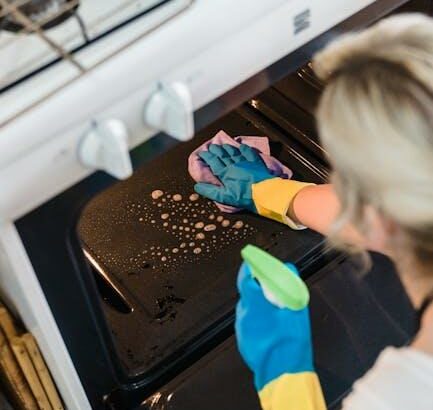
What’s that blackened, crusty mess staring back at you from the bottom of your oven? We’ve all been there – the remnants of last week’s lasagna or yesterday’s pizza that seem to have welded themselves onto the oven floor. But fear not, brave home cook, for there are tricks and techniques to conquer these baked-on monsters. In this article, we’ll explore some simple yet effective ways to tackle those stubborn messes and restore your oven to its former sparkling glory. So put on your cleaning gloves and let’s dive into the world of oven cleaning!
Table of Contents
- Unlocking the Power of Baking Soda for Oven Grime
- Harnessing the Heat with Self-Cleaning Cycles
- Ammonia Magic for Effortless Grease Removal
- Natural Citrus Solutions for Eco-Friendly Shine
- The Dynamic Duo: Vinegar and Water Steam Clean
- Commercial Cleaners for Stubborn Stain Annihilation
- Clay-Based Degreasers: Your Oven’s Best Friend
- Soda Crystals: The Heavy-Duty Scrubbing Champion
- Fine-tuning with Toothpaste for Spotless Detailing
- Aluminum Foil Balls: Your Secret Weapon Against Gunk
- Questions & Answers for Oven Cleaning Techniques for Baked-On Messes
- To Wrap It Up
Unlocking the Power of Baking Soda for Oven Grime

Let’s face it, cleaning up baked-on food in your oven can be a daunting task. But fear not, because there’s a powerful and all-natural solution right in your kitchen pantry: baking soda. This humble ingredient is not only great for baking, but it’s also a miracle-worker when it comes to tackling tough oven grime. Here’s how you can harness the power of baking soda to make your oven sparkle again.
First, start by removing any loose food particles from the oven. You can use a damp cloth or sponge to wipe away any crumbs or residue. Then, mix a generous amount of baking soda with water to create a thick paste. Apply this paste to the inside of the oven, focusing on the areas with the most baked-on grime. Let it sit for at least 12 hours, or overnight if possible. The baking soda will work its magic by loosening the stuck-on food, making it easier to clean.
Once the baking soda paste has had time to work its magic, grab a damp cloth or sponge and begin scrubbing the inside of the oven. You’ll be amazed at how easily the baked-on food comes off! For stubborn spots, you can use a plastic scraper to gently remove the grime. After you’ve finished scrubbing, use a clean, damp cloth to wipe away any remaining baking soda residue. Your oven should now be sparkling clean and free of baked-on messes.
In addition to using baking soda for oven cleaning, you can also use it to absorb and neutralize odors in the kitchen. Simply place an open box of baking soda in the back of the oven to keep it smelling fresh. Plus, baking soda is non-toxic and safe to use around food, making it the perfect choice for a deep clean in the kitchen. So next time you’re faced with tough oven grime, reach for that trusty box of baking soda and let it work wonders on your baked-on messes.
Harnessing the Heat with Self-Cleaning Cycles
When it comes to oven cleaning, one of the most effective ways to tackle baked-on messes is by harnessing the power of your oven’s self-cleaning cycle. This feature uses high heat to incinerate food spills and grease, leaving you with a clean oven without the need for harsh chemicals or scrubbing.
To start the self-cleaning process, remove any oven racks and accessories, as the extreme heat can damage them. Then, simply select the self-cleaning option on your oven and let it do the work. The oven will heat up to temperatures upwards of 800°F, turning any baked-on food into ash that can easily be wiped away once the cycle is complete.
One of the key benefits of using the self-cleaning cycle is that it eliminates the need for chemical cleaners, making it a safer and more eco-friendly option for kitchen deep cleaning. It’s also a time-saver, allowing you to set the cycle and move on to other tasks while your oven cleans itself.
However, there are some drawbacks to be aware of. The extreme heat generated during the self-cleaning cycle can create strong odors and may even set off smoke detectors, so it’s important to ensure proper ventilation during the process. Additionally, the intense heat can cause damage to older or poorly-maintained ovens, so be sure to follow your manufacturer’s recommendations for using the self-cleaning feature.
Ammonia Magic for Effortless Grease Removal

Let’s face it, cleaning baked-on food from your oven can be a daunting task. The grease and grime seem to be stuck for good, no matter how much elbow grease you put into it. But fear not, because there’s a secret weapon in the battle against stubborn oven messes: ammonia. This powerful cleaning agent can make your kitchen deep cleaning a breeze, leaving your oven sparkling like new.
Step 1: Prepare Your Workspace
Before you start, make sure to open windows and doors for ventilation, as ammonia can have a strong odor. Also, remove any oven racks and wipe away loose debris with a damp cloth.
Step 2: Ammonia Application
Place a small bowl of ammonia in the oven and close the door. Let it sit overnight to work its magic on the baked-on messes.
Step 3: Wipe It Clean
The next day, open the oven and remove the bowl of ammonia. Use a damp cloth to wipe away the softened grease and grime. For stubborn spots, a non-abrasive sponge can help to gently scrub the mess away.
Final Step: Rinse and Reassemble
Once the oven is clean, rinse the interior with water and a gentle soap to remove any remaining ammonia residue. Then, dry the oven thoroughly and reassemble the racks.
Ammonia can be a game-changer when it comes to oven cleaning. Its powerful grease-cutting properties make it an effective and effortless solution for removing baked-on messes. However, it’s essential to use caution and follow safety guidelines when working with ammonia. With a little patience and the right technique, your oven can be spotless in no time.
Natural Citrus Solutions for Eco-Friendly Shine

When it comes to tackling those stubborn baked-on messes in your oven, natural citrus solutions can be a game-changer. Not only are these methods safe and eco-friendly, but they are also incredibly effective at cutting through grease and grime, leaving your oven sparkling clean.
Here are some techniques to help you achieve a beautifully clean oven without the use of harsh chemicals.
Citrus Degreaser: Create your own natural degreaser by mixing equal parts of water and white vinegar with freshly squeezed citrus juice (lemon or orange work best). Transfer the solution to a spray bottle and generously apply it to the interior surfaces of your oven. Let it sit for 15-20 minutes to allow the citrus enzymes to break down the baked-on food particles.
Baking Soda Paste: For tougher stains, a baking soda paste can work wonders. Mix a few tablespoons of baking soda with water to create a thick paste. Apply this paste to the stained areas, focusing on the most stubborn spots. Let it sit for at least 30 minutes, then use a damp sponge to scrub away the grime. The gentle abrasive nature of baking soda combined with the natural cleaning power of citrus juice makes this method highly effective in lifting baked-on food residue.
Citrus Steam Clean: Another great way to loosen baked-on food is by using the power of steam. Fill a heatproof dish with water and add some citrus peels – lemon, orange, or lime. Place the dish in the preheated oven and let it sit for 20-30 minutes while the steam works its magic. The natural oils in the citrus peels will help to soften and lift the baked-on mess, making it easier to wipe away with a clean cloth.
By using these natural citrus solutions, you can effectively clean baked-on food in your oven while avoiding the use of harsh chemicals. These eco-friendly methods not only leave your oven sparkling, but they also contribute to a healthier and safer kitchen environment for you and your family. Give them a try and experience the power of nature in kitchen deep cleaning.
The Dynamic Duo: Vinegar and Water Steam Clean

When it comes to cleaning baked-on messes in your oven, vinegar and water are a dynamic duo that can work wonders. This natural and chemical-free solution is not only effective but also safe for your kitchen and the environment. Here’s how you can use vinegar and water steam to tackle those stubborn, burnt-on food stains in your oven.
Step 1: Prepare the Solution
- Mix equal parts of vinegar and water in a heat-safe bowl or container.
- Place the mixture inside your oven and heat it to 250°F for 30 minutes.
- The steam created will help loosen the baked-on food, making it easier to wipe off.
Step 2: Wipe Down the Oven
- After allowing the steam to work its magic, use a damp cloth or sponge to wipe down the interior of the oven.
- The baked-on food should now be loosened and easier to remove, leaving your oven sparkling clean.
Step 3: Rinse and Dry
- Once you’ve wiped down the oven, use a clean damp cloth to rinse off any remaining residue.
- Dry the interior of the oven with a soft, dry cloth to avoid any water stains or streaks.
Using vinegar and water steam to clean baked-on messes is a cost-effective and eco-friendly solution that can save you time and effort. However, it’s important to note that this method may not be suitable for all types of ovens, such as self-cleaning ovens or those with delicate surfaces. Always refer to your oven’s manufacturer guidelines for the best cleaning method suited to your specific oven.
In summary, the dynamic duo of vinegar and water can be a game-changer when it comes to tackling baked-on food stains in your oven. This natural, chemical-free method is not only effective but also safe for your kitchen and the environment. Give it a try and experience the satisfaction of a sparkling clean oven without the use of harsh chemicals.
Commercial Cleaners for Stubborn Stain Annihilation

When it comes to oven cleaning, there’s nothing more frustrating than baked-on messes that refuse to budge. But fear not, because with the right techniques and commercial cleaners, you can annihilate even the most stubborn stains and restore your oven to its former glory.
Step 1: Preparing the Oven
Before diving into the cleaning process, it’s important to prepare your oven for the task at hand. Start by removing any loose debris and food particles from inside the oven. Make sure the appliance is completely cool before you begin.
Step 2: Choosing the Right Cleaner
When it comes to tackling baked-on food, not all commercial cleaners are created equal. Look for products specifically designed for oven cleaning, as they are formulated to break down tough stains and grease. Some popular options include:
- EASY-OFF Heavy Duty Cleaner
- Astonish Oven and Cookware Cleaner
Step 3: Applying the Cleaner
Once you’ve selected your weapon of choice, it’s time to apply the cleaner to the affected areas. Follow the manufacturer’s instructions carefully, and be sure to wear protective gloves to avoid skin irritation.
Step 4: Scrubbing and Rinsing
After allowing the cleaner to work its magic, it’s time to get scrubbing. Use a non-abrasive scrubbing pad or brush to gently scrub away the baked-on mess. Once the grime has been loosened, wipe down the surfaces with a damp cloth to remove any residue.
By following these oven cleaning techniques and using the right commercial cleaners, you can say goodbye to stubborn stains and hello to a sparkling clean oven. So, roll up your sleeves and get ready to tackle that kitchen deep cleaning with confidence!
Clay-Based Degreasers: Your Oven’s Best Friend
When it comes to tackling those dreaded baked-on messes in your oven, clay-based degreasers are a game-changer. Not only are they effective at breaking down tough, caked-on food residue, but they are also non-toxic and safe to use in your kitchen. Here’s how to use clay-based degreasers to clean baked-on food and achieve a sparkling clean oven.
Step 1: Preparing the Oven
Before applying the clay-based degreaser, it’s important to prepare the oven by removing the racks and any loose debris. This will allow for easier access to the interior of the oven and ensure a thorough cleaning process.
Step 2: Applying the Degreaser
Using a soft sponge or cloth, apply the clay-based degreaser to the interior surfaces of the oven. Pay special attention to areas with baked-on food residue, making sure to coat them evenly with the degreaser. Allow the product to sit for the recommended amount of time according to the manufacturer’s instructions.
Step 3: Wiping Away the Mess
Using a damp cloth or sponge, gently wipe away the degreaser along with the dissolved baked-on food residue. For stubborn spots, a plastic scraper can be used to gently loosen the residue before wiping it away. Repeat this process as needed until the oven is clean and free of residue.
Step 4: Reassembling the Oven
After the cleaning process is complete, replace the oven racks and give the interior a final wipe down to remove any remaining residue. Your oven is now clean and ready to use!
Clay-based degreasers are an excellent choice for tackling baked-on messes in your oven. They are safe, effective, and easy to use, making them a must-have for kitchen deep cleaning. Plus, their non-toxic formulation means you can clean your oven without worrying about harmful chemicals. Give clay-based degreasers a try, and say goodbye to baked-on food messes for good!
Soda Crystals: The Heavy-Duty Scrubbing Champion

When it comes to oven cleaning, tackling baked-on messes can be a real challenge. However, with the help of soda crystals, you can make light work of even the toughest grime and grease. Here’s why soda crystals are the heavy-duty scrubbing champion you need in your kitchen deep cleaning arsenal.
1. How Soda Crystals Work
Soda crystals, also known as washing soda, are a versatile cleaning agent that works by breaking down grease and grime, making them easier to scrub away. When mixed with water, soda crystals create an alkaline solution that is highly effective at cutting through baked-on food residue, leaving your oven sparkling clean.
2. Step-by-Step Guide to Using Soda Crystals for Oven Cleaning
- Preheat your oven to 50°C (120°F) and then turn it off. This will warm the oven, making the cleaning process more effective.
- Mix a solution of soda crystals and water, following the instructions on the packaging, and apply it to the interior surfaces of your oven.
- Let the solution sit for at least 30 minutes to allow the soda crystals to work their magic.
- Use a scouring pad or scrubbing brush to remove the baked-on food, paying extra attention to the most stubborn areas.
- Wipe away the residue with a damp cloth, and then rinse the surfaces with clean water.
3. Pros and Cons of Using Soda Crystals for Oven Cleaning
Pros:
- Effective at tackling baked-on food and grease
- Affordable and readily available
- Environmentally friendly alternative to harsh chemical cleaners
Cons:
- Can be abrasive on delicate surfaces if not used correctly
- May require some extra elbow grease for heavily soiled ovens
In conclusion, when it comes to clean baked-on food from your oven, soda crystals are a reliable and heavy-duty option. With their powerful cleaning properties and eco-friendly nature, they are a must-have for anyone looking to keep their oven sparkling clean without resorting to harsh chemicals. Try using soda crystals for your next kitchen deep cleaning session, and see the difference for yourself.
Fine-tuning with Toothpaste for Spotless Detailing
When it comes to oven cleaning techniques for baked-on messes, toothpaste may seem like an unusual choice, but it can work wonders for spotless detailing. Here’s how to utilize toothpaste for fine-tuning your oven and achieving a sparkling clean finish.
Step 1: Choose the Right Toothpaste
Not all toothpaste is created equal when it comes to oven cleaning. Look for a non-gel, non-whitening toothpaste that contains baking soda. The baking soda will act as a gentle abrasive to help lift away stubborn baked-on food without damaging the interior of the oven.
Step 2: Apply the Toothpaste
Using a damp sponge, apply a small amount of toothpaste to the baked-on messes in your oven. Gently scrub the affected areas, focusing on the most stubborn spots. The baking soda in the toothpaste will help to break down the residue, making it easier to wipe away.
Step 3: Let it Sit
Allow the toothpaste to sit on the baked-on messes for at least 10-15 minutes. This will give the baking soda time to work its magic and loosen the food particles, making them easier to remove.
Step 4: Wipe Clean
After allowing the toothpaste to sit, use a clean, damp cloth to wipe away the toothpaste and the loosened food particles. You may need to repeat the process for especially tough spots, but with a little patience and elbow grease, your oven will be left spotless and shining.
By utilizing toothpaste as part of your kitchen deep cleaning routine, you can achieve a spotless finish without the need for harsh chemicals. Plus, toothpaste is readily available and affordable, making it a convenient option for fine-tuning your oven. Give it a try and see the difference for yourself!
Aluminum Foil Balls: Your Secret Weapon Against Gunk
When it comes to oven cleaning, tackling baked-on messes can be a real challenge. The good news is that you can use aluminum foil balls as a secret weapon to make this task a whole lot easier. Here’s how:
Step 1: Create Your Aluminum Foil Balls
Take a piece of aluminum foil and crumple it into a ball. Make several of these balls to use in the oven cleaning process. The texture of the foil makes them perfect for scrubbing off tough, baked-on food.
Step 2: Use Your Foil Balls to Scrub
After removing the racks and any loose debris from your oven, wet the foil balls and begin to scrub away the baked-on food. The foil is abrasive enough to remove the gunk without scratching the surface of your oven. This method is particularly effective for getting into those hard-to-reach areas.
Step 3: Rinse and Dry Your Oven
Once the gunk is gone, use a damp cloth to wipe down the interior of your oven, removing any remaining residue. Then, dry the oven thoroughly before replacing the racks and using your sparkling-clean appliance once again.
By using aluminum foil balls, you can achieve a deep clean of your oven without the need for harsh chemicals or expensive cleaning products. This method is eco-friendly, cost-effective, and can be done with items you likely already have in your kitchen.
Questions & Answers for Oven Cleaning Techniques for Baked-On Messes
How do I clean baked-on messes in my oven?
To clean baked-on messes in your oven, you can use a homemade baking soda and water paste or a commercial oven cleaner to loosen and remove the tough stains.
Can I use vinegar to clean my oven?
Yes, you can use vinegar to clean your oven. Mix equal parts of vinegar and water in a spray bottle and spray it on the baked-on messes. Let it sit for a few minutes before wiping it off.
Is it safe to use oven cleaner on a self-cleaning oven?
No, you should not use oven cleaner on a self-cleaning oven as it can damage the interior of the oven. Instead, follow the manufacturer’s instructions for using the self-cleaning function.
How often should I clean my oven?
It is recommended to clean your oven every 3-6 months, or more often if you frequently cook foods that create baked-on messes.
What is the best way to remove burnt-on grease from my oven racks?
To remove burnt-on grease from your oven racks, soak them in hot, soapy water for a few hours, then scrub them with a non-abrasive sponge or brush.
Can I use a razor blade to scrape off baked-on messes in my oven?
Yes, you can use a razor blade to gently scrape off baked-on messes in your oven, but be cautious and use light pressure to avoid scratching the interior surface.
How can I prevent baked-on messes in my oven?
To prevent baked-on messes in your oven, line the bottom with a non-stick oven liner, cover dishes with foil to catch spills, and wipe up any spills or splatters as soon as they occur.
Is it safe to use a steam cleaner to clean my oven?
Yes, you can use a steam cleaner to clean your oven. Just be sure to follow the manufacturer’s instructions and avoid getting the steam in the electrical components.
Can I use a natural cleaner to clean my oven?
Yes, you can use natural cleaners like lemon juice, baking soda, and vinegar to clean your oven. They are effective at removing baked-on messes and are safer for the environment.
Can I clean my oven without using harsh chemicals?
Yes, you can clean your oven without using harsh chemicals by using a homemade baking soda and water paste, a vinegar and water solution, or a commercial cleaner labeled as non-toxic and eco-friendly.
To Wrap It Up
So there you have it, friends! With these oven cleaning techniques for baked-on messes, you can say goodbye to those stubborn, stubborn stains that have been haunting your oven. Remember, a clean oven not only looks better, but it also performs better and your food will taste even better! Don’t let baked-on messes get the best of you – with a little patience and these tips, you can have a sparkling clean oven in no time. Happy cleaning and happy cooking! Cheers to a mess-free, delicious future in the kitchen!