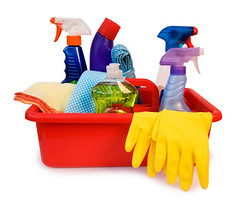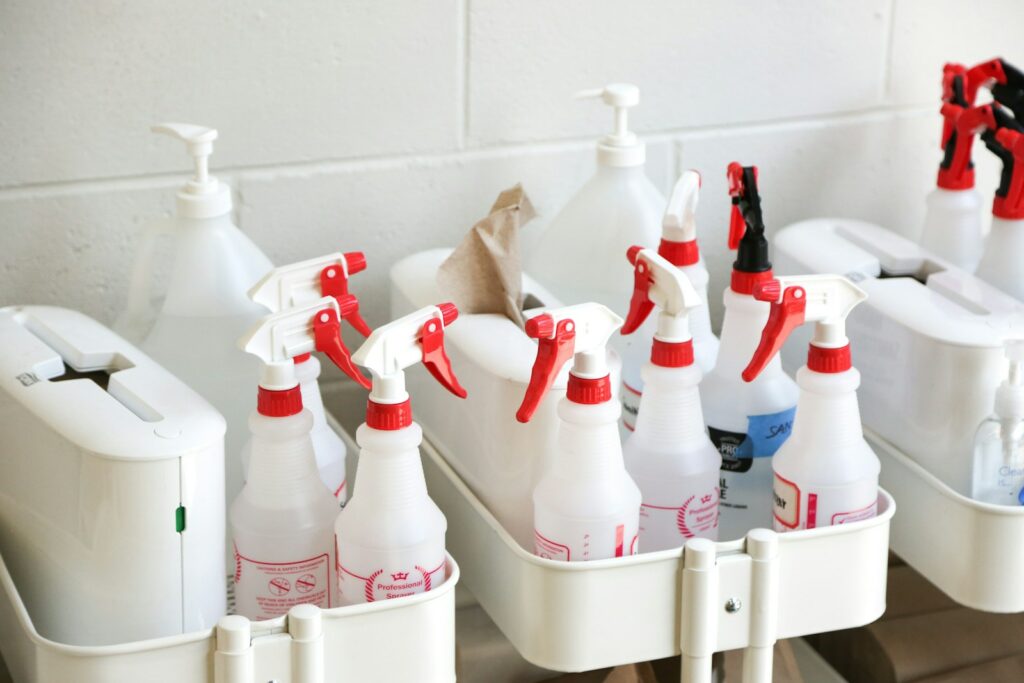
Do you ever find yourself digging through a jumbled mess of cleaning supplies to find the one you need? Or maybe you’re tired of cluttered closets and overflowing cabinets? It’s time to bring some order to your cleaning routine! In this article, we will explore some creative and practical storage solutions for organizing your cleaning supplies, so you can say goodbye to clutter and hello to a clean and organized space. Let’s dive in and discover how to streamline your cleaning routine with some simple and effective organization strategies.
Table of Contents
- Maximize Your Cleanliness with Over-the-Door Organizers
- Tuck it Away: Clever Use of Hidden Spaces for Cleaning Supplies
- Master the Art of Clean with Magnetic Storage Magic
- From Tangled to Tidy: Wrangle Your Cleaning Tools with Pegboards
- Slide-Out Success: Transforming Cabinet Storage for Spotless Spaces
- Stack and Store: Vertical Shelving Solutions for Sparkling Supplies
- Caddy Carry-All: Portable Perfection for Every Cleaning Mission
- Divide and Conquer: Drawer Dividers for Neatness Ninjas
- Enlist Elegant Utility Carts for Cleaning Supply Chic
- Hang in There: S-Hooks and Rails for Accessible Organization Bliss
- Questions & Answers for How to Organize Your Cleaning Supplies
- In Conclusion
Maximize Your Cleanliness with Over-the-Door Organizers
When it comes to keeping your cleaning supplies organized and easily accessible, over-the-door organizers are a game-changer. These versatile storage solutions allow you to make the most of your space, whether you live in a small apartment or a spacious home. By utilizing over-the-door organizers, you can streamline your cleaning routine and ensure that everything you need is right at your fingertips. Keep reading to discover how to make the most of these handy organizers and elevate your cleaning game.
Benefits of Over-the-Door Organizers:
- Space-saving: Over-the-door organizers make use of vertical space, freeing up valuable shelf and cabinet space for other items.
- Easy access: With everything hanging neatly on the back of a door, you can quickly grab the cleaning supplies you need without rummaging through crowded cabinets.
- Customizable: Many over-the-door organizers come with adjustable hooks and shelves, allowing you to customize the layout to fit your specific cleaning supplies.
- Versatile storage: From brooms and mops to spray bottles and sponges, over-the-door organizers can accommodate a wide range of cleaning tools and products.
How to Make the Most of Over-the-Door Organizers:
- Assess your needs: Take stock of your cleaning supplies and determine the best over-the-door organizer for your space and needs.
- Install the organizer: Follow the manufacturer’s instructions for a secure and stable installation. Make sure to choose a door that can support the weight of the organizer and its contents.
- Organize your supplies: Group similar items together and arrange them in the organizer in a way that makes sense for your cleaning routine. For example, keep all glass-cleaning supplies in one section and all dusting supplies in another.
By incorporating over-the-door organizers into your cleaning routine, you can maximize your cleanliness while minimizing clutter. With the right organizer and a strategic approach to organizing your supplies, you can transform your cleaning routine and make your space sparkle. So why not take advantage of these simple yet effective storage solutions and revolutionize the way you organize your cleaning supplies?
Tuck it Away: Clever Use of Hidden Spaces for Cleaning Supplies
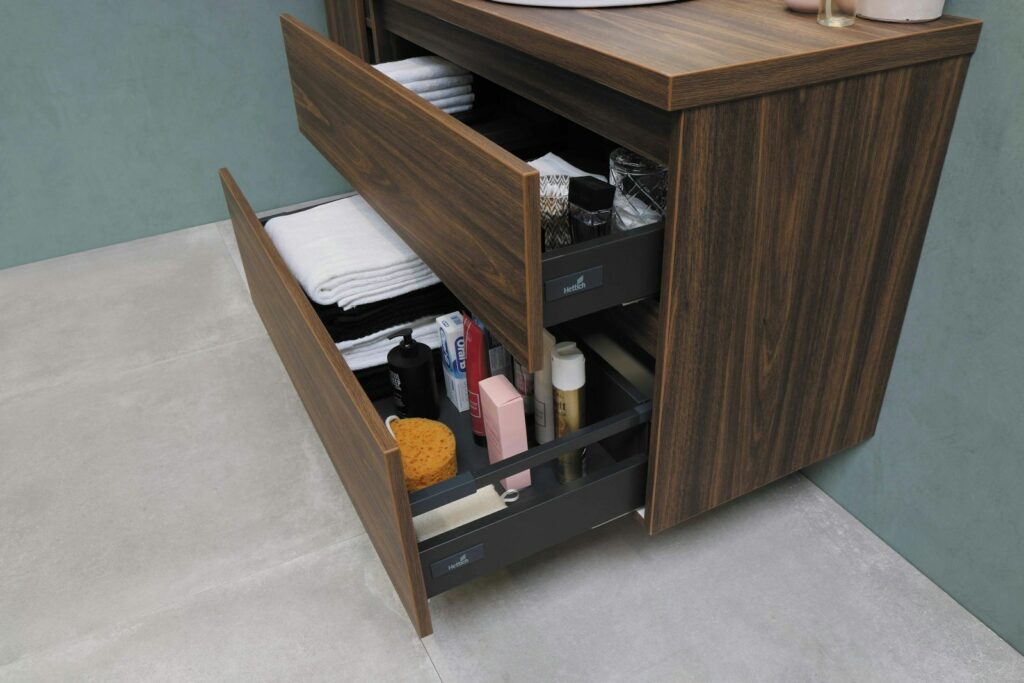
When it comes to organizing your cleaning supplies, finding clever storage solutions can make a world of difference. Utilizing hidden spaces in your home can help you keep your cleaning supplies tidy and easily accessible. Here are some creative ways to tuck away your cleaning supplies:
Inside Cabinet Doors: Mounting organizers to the inside of cabinet doors can provide extra storage space for bottles, brushes, and other cleaning essentials. This is a great way to keep items off countertops and out of sight.
Under the Sink: Utilize the space under your sink by installing pull-out drawers or baskets. This will help you make the most of the vertical space and keep your cleaning supplies neatly organized.
Hanging Storage: Consider using hanging storage solutions, such as over-the-door organizers or hooks, to keep your cleaning supplies in easy reach. This is especially useful for smaller items like sponges and cloths.
In addition to these hidden storage solutions, it’s important to keep your cleaning supplies organized within their designated spaces. Use bins or baskets to group similar items together, and label everything to make it easy to find what you need. By implementing these clever storage ideas, you can keep your cleaning supplies organized and easily accessible, making chore time a little more manageable.
| Pros | Cons |
|---|---|
| Maximizes storage space | May require some DIY |
| Keeps items out of sight | Must be mindful of weight limits for hanging storage |
| Makes cleaning supplies easily accessible |
By implementing these clever storage ideas, you can keep your cleaning supplies organized and easily accessible, making chore time a little more manageable. For more cleaning storage solutions, check out The Container Store.
Invest in Multi-Purpose Products To Minimize the Number of Cleaning Supplies
One way to minimize the number of cleaning supplies you have is to invest in multi-purpose products. Look for all-in-one cleaning solutions that can be used on a variety of surfaces, from countertops to glass and mirrors. This can help you streamline your cleaning routine and eliminate the need for multiple specialized products. Consider switching to eco-friendly cleaning supplies as well, as many of these products are designed to be versatile and effective for a wide range of cleaning tasks.
Master the Art of Clean with Magnetic Storage Magic
Are you tired of struggling to keep your cleaning supplies organized and easily accessible? Look no further! With the power of magnetic storage solutions, you can transform the way you organize your cleaning supplies and make the daunting task of cleaning a breeze. Organize cleaning supplies with these ingenious magnetic storage ideas:
Magnetic strips: Install magnetic strips on the inside of your cleaning cabinet doors to hold metal items such as spray bottles, dust pans, and scrub brushes. This not only saves space but also keeps your supplies neatly organized and within reach.
Magnetic bins: Use magnetic bins to store smaller cleaning supplies such as sponges, scrub pads, and microfiber cloths. Simply stick these bins to the side of your washing machine or dryer for easy access while doing laundry, or to the inside of your cleaning closet door.
Magnetic hooks: Hang metal cleaning tools such as brooms, mops, and dusters on magnetic hooks to keep them off the floor and out of the way. This clever solution not only saves space but also prevents potential tripping hazards.
By utilizing these magnetic storage solutions, you can organize cleaning supplies in a way that is both efficient and visually appealing. No more fumbling through cluttered cabinets or digging through overstuffed closets to find the cleaning supplies you need. With magnetic storage magic, everything has its place, making cleaning a more streamlined and enjoyable task.
If you’re looking for a specific magnetic storage product recommendation, we’ve found that the Magnetic Tool Holder Bar by Master Magnetics is a top choice for its durability and versatility. It’s perfect for organizing metal cleaning supplies in a variety of spaces, and it’s easy to install with the included mounting hardware.
So say goodbye to the chaos of disorganized cleaning supplies and hello to the magic of magnetic storage. With these innovative solutions, you can organize cleaning supplies in a way that is both practical and visually pleasing, making the chore of cleaning a little more magical.
From Tangled to Tidy: Wrangle Your Cleaning Tools with Pegboards
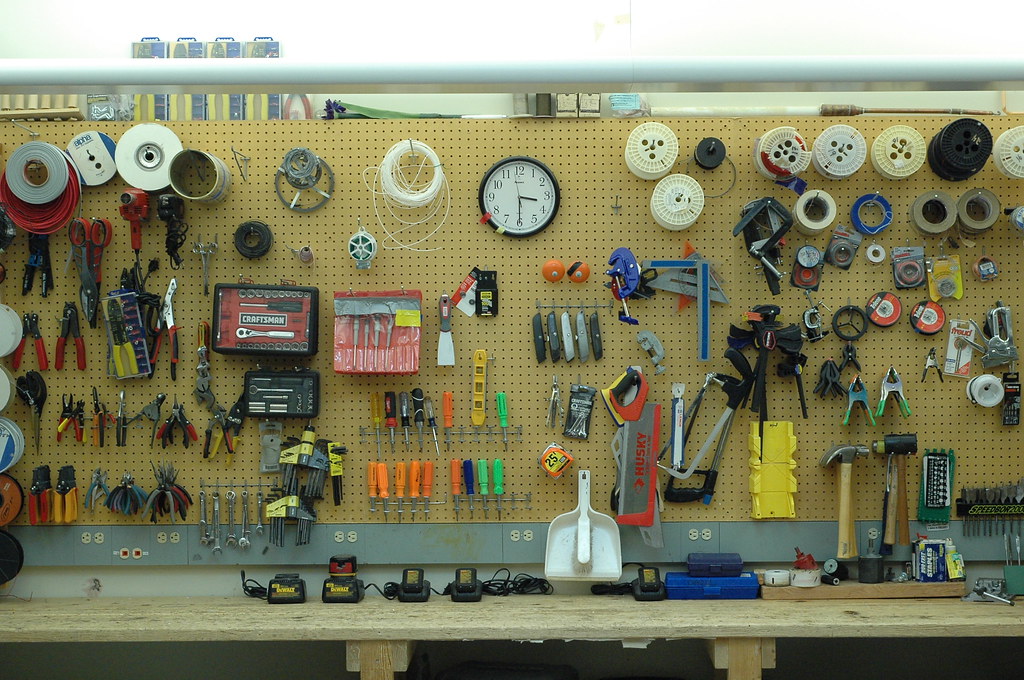
Get Your Cleaning Tools Under Control
Are your cleaning tools taking over your space, making it difficult to find what you need when you need it? It’s time to wrangle those supplies and get them organized with pegboards. With the right setup, you can turn chaos into order and have your cleaning tools neatly stored and easily accessible.
Why Choose Pegboards for Cleaning Supply Organization
Pegboards are a versatile and customizable solution for organizing cleaning supplies. Here are a few reasons why they are the ideal option:
- Versatility: Pegboards can be customized to fit your specific needs and the layout of your space.
- Visibility: With all your cleaning tools in plain sight, you can easily find what you need without rummaging through drawers or cabinets.
- Accessibility: Keep your most-used tools within arm’s reach, making cleaning tasks more efficient.
- Space-saving: Pegboards make use of vertical space, freeing up valuable floor and countertop space.
- Aesthetic appeal: With the right design, pegboards can add a stylish and organized look to your cleaning area.
Step-by-Step Guide to Setting Up Your Pegboard Cleaning Station
- Gather your supplies:
- Pegboard
- Pegboard hooks and accessories
- Drill and screws
- Level
- Cleaning supply organizers (baskets, shelves, etc.)
Plan your layout:
- Measure your space and determine where the pegboard will be installed.
- Arrange your cleaning tools and accessories to see what configuration will work best.
Install the pegboard:
- Use the level to ensure the pegboard is straight.
- Secure the pegboard to the wall using the drill and screws.
Hang your supplies:
- Use a variety of hooks and accessories to hang your cleaning tools and supplies in an organized manner.
By following these steps and taking advantage of the benefits of pegboard organization, you can transform your cleaning supplies from a tangled mess to a tidy and efficient system. Organize cleaning supplies with pegboards for a clean and clutter-free space!
Slide-Out Success: Transforming Cabinet Storage for Spotless Spaces
If you’re tired of rummaging through cluttered cabinets and closets to find your cleaning supplies, it’s time to transform your storage space with slide-out solutions. Organizing your cleaning supplies doesn’t have to be a daunting task – with the right tools and techniques, you can create a spotless space that’s not only functional but also aesthetically pleasing. Here’s how to organize your cleaning supplies with ease:
Step 1: Assess Your Space
Before diving into the organization process, take a closer look at your cabinet storage space. Determine the dimensions of your cabinets and identify any specific challenges or limitations that may affect your organization efforts. This will help you choose the right cleaning storage solutions that fit your space and meet your needs.
Step 2: Choose the Right Slide-Out Systems
Invest in slide-out systems that are designed to maximize cabinet storage space and provide easy access to your cleaning supplies. Whether it’s pull-out shelves, basket systems, or drawer organizers, there are plenty of options to choose from. Consider the size and shape of your cleaning supplies when selecting the right storage solutions to ensure a perfect fit.
Step 3: Arrange and Label Your Supplies
Once you have your slide-out systems in place, it’s time to arrange your cleaning supplies in an orderly manner. Group similar items together and use labels to identify them for quick and easy access. This not only helps you stay organized but also makes it easier to keep track of your inventory and restock when needed.
By following these simple steps, you can transform your cabinet storage for spotless spaces and say goodbye to chaotic cleaning supply cabinets. With the right cleaning storage solutions and a strategic organization plan, you can create a functional and visually appealing space that makes cleaning a breeze.
| Recommendation | Description | Pros | Cons |
|---|---|---|---|
| Pull-Out Shelves | Great for easy access | – Maximizes space - Easy to install | – May be pricier than other options |
When it comes to organizing your cleaning supplies, having an efficient storage solution can make all the difference. Vertical shelving is a fantastic way to maximize space and keep everything tidy and easily accessible. Here are some tips and tricks for using vertical shelving to create a sparkling and well-organized cleaning supplies area in your home.
Benefits of Vertical Shelving Solutions
Vertical shelving offers a range of benefits for organizing cleaning supplies. Here are just a few:
- Maximize Space: Vertical shelving utilizes the height of a room, allowing you to make the most of every inch of storage space.
- Easy Access: With vertical shelving, all of your cleaning supplies are within easy reach, making it simple to grab what you need, when you need it.
- Visibility: Storing supplies on vertical shelves allows you to see everything at a glance, making it easier to keep track of what you have and what you need to restock.
How to Organize Your Cleaning Supplies with Vertical Shelving
Here’s a step-by-step guide to creating a well-organized cleaning supplies area using vertical shelving:
- Assess your space: Take stock of the area where you plan to install vertical shelving to determine the best placement and size for your shelves.
- Sort and categorize: Group similar cleaning supplies together, such as glass cleaners, bathroom cleaners, and surface disinfectants, so that you can easily see what you have and what you need.
- Choose the right shelving: Select a vertical shelving system that best suits your space and the size of your cleaning supplies. Look for adjustable shelves to accommodate different bottle heights and sizes.
By following these steps, you can create an efficient and aesthetically pleasing cleaning supplies storage area that will make chores a breeze.
Caddy Carry-All: Portable Perfection for Every Cleaning Mission
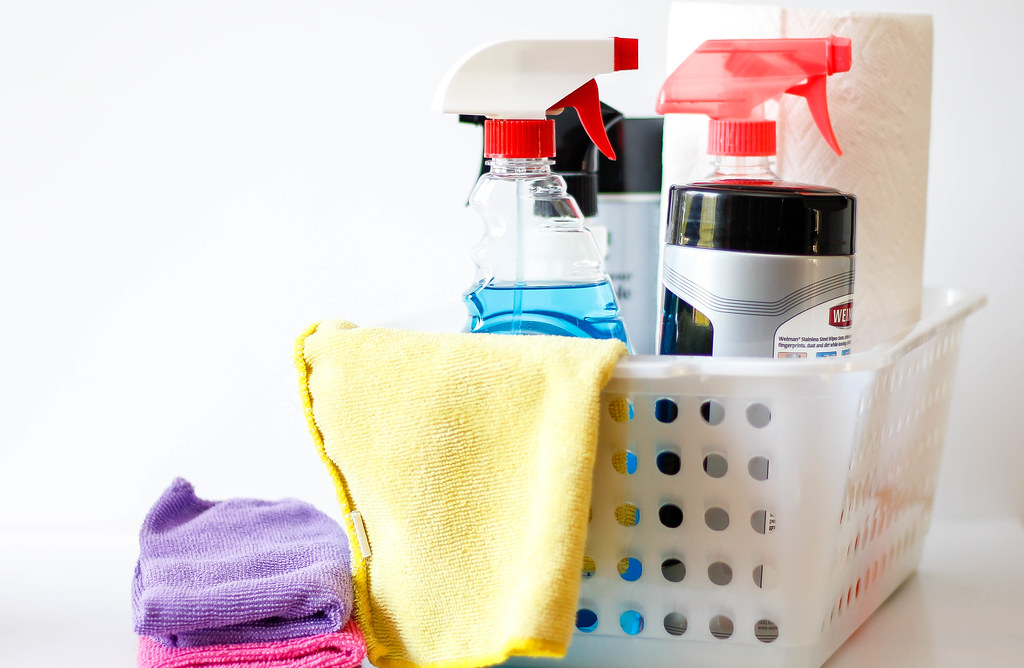
Keep Your Cleaning Supplies Tidy with a Caddy Carry-All
When it comes to cleaning, organization is key. The first step to maintaining a clean and tidy home is to have all your cleaning supplies in one place and easily accessible. A caddy carry-all is the perfect portable solution that allows you to take your cleaning supplies with you from room to room, making it perfect for every cleaning mission. Whether you need to tackle a spill in the kitchen or dust the shelves in the living room, a caddy carry-all keeps everything you need within arm’s reach.
The Ultimate Cleaning Storage Solution
The beauty of a caddy carry-all is its versatility. With various compartments and pockets, you can store all your cleaning essentials in one convenient place. From multi-surface cleaners and disinfectant wipes to scrub brushes and microfiber cloths, a caddy carry-all can hold it all. Plus, it’s easy to carry around the house and even take with you on the go for cleaning tasks outside the home.
How to Organize Your Cleaning Supplies
To get started with organizing your cleaning supplies in a caddy carry-all, begin by sorting your supplies into categories such as sprays, wipes, brushes, and cloths. Then, assign each category to a specific compartment or pocket in the caddy. This will make it easy to locate and grab the item you need when cleaning. Additionally, consider labeling the compartments for quick and easy identification. By keeping your cleaning supplies organized in a caddy carry-all, you’ll streamline your cleaning routine and make it more efficient.
| Pros | Cons |
|---|---|
| – Portable and convenient | – May not fit all supplies |
| – Keeps supplies organized | - Limited in size |
With the right caddy carry-all, you can make every cleaning mission a breeze.
Divide and Conquer: Drawer Dividers for Neatness Ninjas
Are you tired of rummaging through a cluttered mess of cleaning supplies every time you need to tidy up your space? It’s time to take control of the chaos and transform your cleaning storage with the magic of drawer dividers! Organize your cleaning supplies like a pro and say goodbye to the days of hectic, disorganized drawers. In this guide, we’ll show you how to make the most of your drawer space and achieve cleaning storage solutions that will have you feeling like a Neatness Ninja in no time.
Step 1: Assess Your Supplies
Before diving into the world of drawer dividers, take a moment to evaluate your cleaning supplies and determine which items you use most frequently. This will help you prioritize the placement of your supplies within the drawers and ensure that the items you need are easily accessible. Create a mental (or physical) checklist of your go-to cleaning products, as well as any specialty tools or accessories that require unique storage solutions.
Step 2: Choose the Right Drawer Dividers
Now that you have a clear understanding of your cleaning arsenal, it’s time to select the perfect drawer dividers for your needs. There are a variety of options available, including adjustable dividers, expandable organizers, and customizable inserts. Consider the size and shape of your drawers, as well as the types of cleaning supplies you need to store. Go for dividers that are sturdy, easy to install, and versatile to accommodate a range of cleaning products. Here’s a simple comparison of some popular divider options:
| Divider Type | Pros | Cons |
|---|---|---|
| Adjustable | - Can be customized to fit any space | – Not as sturdy as other options |
| Expandable | – Easy to install and move | – Limited in size and shape options |
| Customizable | – Offers tailored storage solutions | – May require assembly |
Step 3: Organize and Conquer!
Once you have your drawer dividers in hand, it’s time to put them to work. Start by arranging your cleaning supplies within the designated compartments and take note of any adjustments that may be needed to optimize the space. Be sure to label the dividers or use clear containers to distinguish between different products and categories. With your newly organized cleaning storage, maintaining a tidy and efficient space will be a breeze. So, roll up your sleeves and get ready to tackle clutter like a true Neatness Ninja!
Ready to conquer the chaos and transform your cleaning storage with drawer dividers? Follow these steps and watch as your cleaning supplies fall into perfect order. With the right dividers and a bit of strategic organizing, you’ll have your drawers looking spick and span in no time! So, grab your dividers, dive into your cleaning supplies, and let the magic of organization take over. Happy organizing!
Enlist Elegant Utility Carts for Cleaning Supply Chic
Are you tired of messy, disorganized cleaning supplies cluttering up your space? Say goodbye to the chaos and hello to stylish organization with these elegant utility carts. Not only do they provide a chic storage solution for your cleaning supplies, but they also offer versatility and convenience in keeping your space tidy and clutter-free.
Why Choose Utility Carts:
- Versatility: These utility carts are not just for cleaning supplies. They can also be used to store and organize a wide range of items, from kitchen essentials to bathroom toiletries.
- Convenience: With wheels for easy mobility, you can take your cleaning supplies wherever you need them without any hassle.
- Space-saving: Say goodbye to cluttered cabinets and shelves. These carts offer an efficient way to maximize space and keep your cleaning supplies neatly organized.
How to Organize Your Cleaning Supplies:
- Sort and Declutter: Start by going through your cleaning supplies and getting rid of anything that is expired or no longer needed.
- Categorize: Group similar items together, such as all-purpose cleaners, brushes, and sponges, to make it easier to find what you need.
- Utilize the Utility Cart: Use the different shelves and compartments on the utility cart to store different categories of cleaning supplies. For example, keep all-purpose cleaners on one shelf, sponges and cloths in a storage basket, and brushes in a separate compartment.
By following these simple guidelines, you can transform your cleaning supplies from cluttered chaos to organized elegance, all while adding a touch of chic to your space.
For a recommended elegant utility cart, check out The Container Store’s Luxe Acrylic Cart, which offers a sleek and stylish solution for organizing your cleaning supplies. With its clear acrylic design and gold accents, it’s not just a storage solution—it’s a statement piece for your home.
Hang in There: S-Hooks and Rails for Accessible Organization Bliss

When it comes to organizing your cleaning supplies, it’s essential to have a system in place that makes everything easily accessible and easy to find. That’s where S-hooks and rails come in to save the day! These simple but ingenious storage solutions can help you create a clutter-free and organized cleaning space that will make your cleaning routine a breeze.
Why S-Hooks and Rails?
- S-hooks and rails provide a versatile and customizable way to hang and store your cleaning supplies, maximizing space and keeping everything within reach.
- They can be easily installed on a variety of surfaces, from walls to doors to the inside of cabinets, making them a practical and versatile storage solution.
- S-hooks and rails come in a variety of sizes and styles to accommodate different cleaning tools and supplies, so you can tailor your organization system to suit your specific needs.
Step-by-Step Guide
- Start by assessing your cleaning supplies and determining which items you use most frequently.
- Install the rails in a convenient location, such as inside a utility closet or on the back of a pantry door.
- Use S-hooks to hang brooms, mops, and dusters on the rails, keeping them off the floor and making them easy to grab when you need them.
By incorporating S-hooks and rails into your cleaning supply organization system, you can create a functional and visually appealing space that will make cleaning a more enjoyable task. So, hang in there and get ready to experience accessible organization bliss!
| Pros | Cons |
|---|---|
| Versatile and customizable | May require some DIY skills |
| Maximizes space | Not suitable for all surfaces |
| Keeps supplies within reach | Can be cumbersome for large items |
You can utilize vertical space by installing shelves or using over-the-door organizers. You can also repurpose small containers or bins to create a designated cleaning supply area.
Invest in Multi-Purpose Products
Another way to minimize the number of cleaning supplies you have is to invest in multi-purpose products. Look for all-in-one cleaning solutions that can be used on a variety of surfaces, from countertops to glass and mirrors. This can help you streamline your cleaning routine and eliminate the need for multiple specialized products. Consider switching to eco-friendly cleaning supplies as well, as many of these products are designed to be versatile and effective for a wide range of cleaning tasks.
Questions & Answers for How to Organize Your Cleaning Supplies
What are some creative cleaning storage solutions for a busy household?
Consider using a rolling cart to keep cleaning supplies easily accessible and portable. You can also use a hanging shoe organizer to store smaller cleaning tools and supplies.
What are some tips for organizing under the kitchen sink?
Use stackable bins or baskets to corral cleaning supplies and utilize a tension rod to hang spray bottles for easy access. Consider adding a lazy Susan for easier access to items in the back.
How can I keep my cleaning supplies organized in a multi-level home?
Consider creating a cleaning caddy for each level of your home so you don’t have to carry supplies up and down the stairs. This will also help prevent duplicate purchases of cleaning products.
What are some space-saving ideas for organizing cleaning supplies in a small apartment?
Try using a shower caddy to store cleaning products in your bathroom and consider mounting a pegboard on the wall to hang cleaning tools and supplies.
How can I prevent my cleaning supplies from becoming cluttered and disorganized?
Designate a specific area for your cleaning supplies and regularly declutter and purge items that are expired or no longer used. Use clear containers to easily identify contents.
What are some ways to organize cleaning supplies in a laundry room?
Install wall-mounted shelves to store cleaning supplies and consider using glass jars to store powdered laundry detergent and other items. Use a tension rod for hanging cleaning tools.
How can I create a cleaning supplies storage area in a garage or outdoor shed?
Consider using a pegboard to hang tools and supplies, and install open shelving for larger items like buckets and mops. Use containers to store smaller items like brushes and sponges.
What are some tips for creating a kid-friendly cleaning supplies storage area?
Use colorful bins or baskets to store children’s cleaning supplies and utilize a lower shelf or space for easy access. Consider labeling bins with pictures to help young children identify items.
How can I maintain an organized cleaning supplies storage system?
Regularly assess your cleaning supplies and storage area to ensure everything is in its proper place. Consider using labels to keep items organized and make it a habit to put things back where they belong after each use.
In Conclusion
So there you have it – some creative and practical solutions for organizing your cleaning supplies and storage. With a little bit of time and effort, you can transform your cleaning routine into a more efficient and enjoyable experience. Say goodbye to cluttered cabinets and awkwardly stacked supplies, and hello to a clean and organized space that makes tackling chores a breeze. Whether you implement a hanging organizer, a labeled bin system, or a DIY storage solution, finding the right method for you can make all the difference in maintaining a tidy and functional cleaning space. Happy organizing!
